
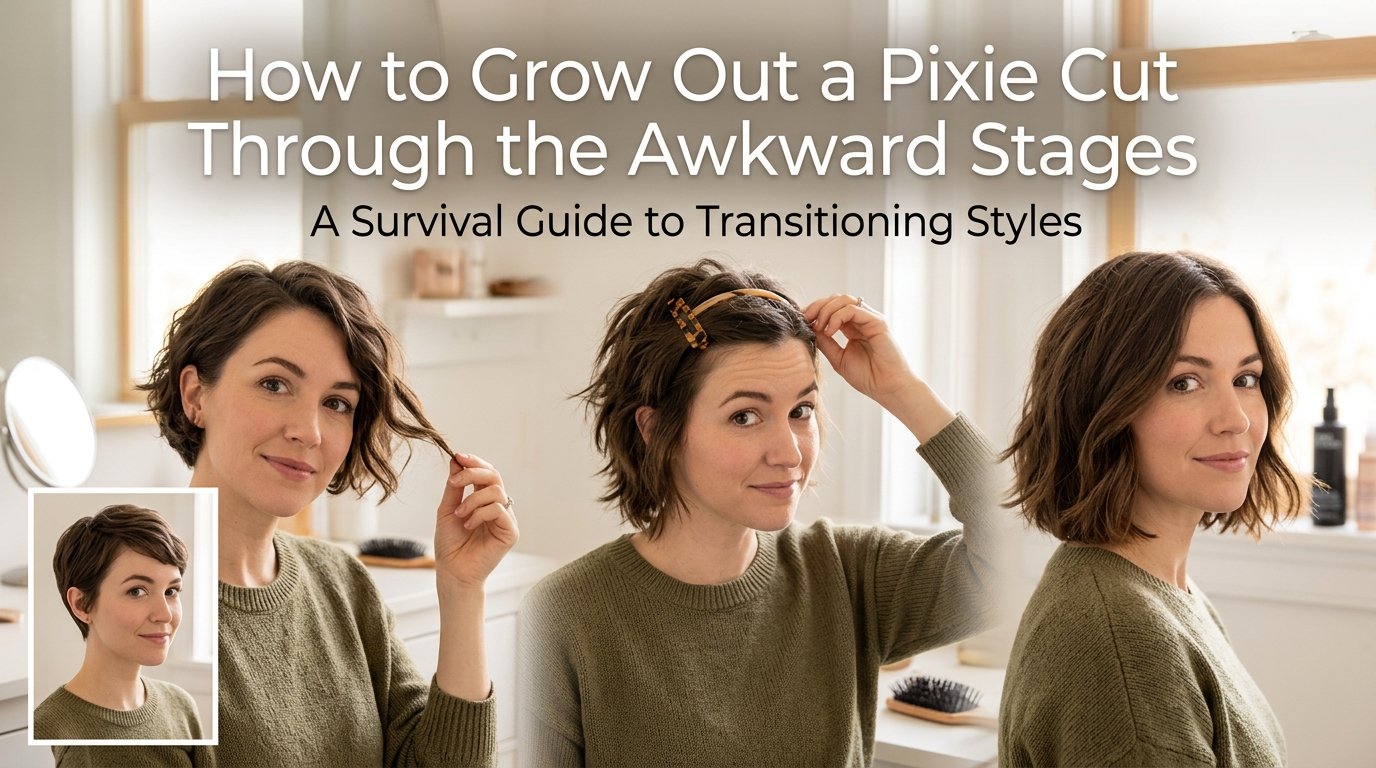
You loved your pixie cut. You really did. But now you are ready for something different, and that means one thing: the grow-out phase. If you are wondering how to grow out a pixie cut without losing your mind, you are in the right place.
Every single person who has grown out short hair has stood in front of the mirror at least once and seriously considered just shaving it all off again. The back grows faster than the top. The sides stick out at weird angles. You catch a reflection of yourself and think you look like a chia pet that gave up halfway through.
Here is the good news: growing out a pixie cut does not have to be a disaster. With the right styling tricks, a strategic trim plan, and some patience, you can move through the awkward growth stages looking intentional rather than unkempt. Our team has guided countless clients through this exact transition, and we are sharing everything we know right here.
In this guide, we will walk you through the full pixie cut grow out timeline, including the three named growth stages and exactly what to expect at each one. We will cover styling techniques for every phase, how to care for your hair and scalp to encourage healthy growth, whether you should still be getting trims (spoiler: yes, but strategic ones), and specific advice for your hair type.
By the end, you will have a complete roadmap from pixie to bob and beyond. Let us turn that awkward phase into a style phase.
Table of Contents
How Long Does It Take to Grow Out a Pixie Cut?
On average, it takes 6 to 12 months to grow out a pixie cut into a short bob. That timeline depends on a few factors: your natural hair growth rate, your starting length, and your goal length.
Hair grows approximately half an inch per month. That is the biological average for human hair, though some people grow slightly faster and others slightly slower. Over a full year, you are looking at about 6 inches of new growth.
For context, a classic pixie cut leaves you with 1 to 3 inches of hair on top and very little at the back and sides. To reach a chin-length bob, you need roughly 5 to 7 inches depending on where your pixie started. That puts most people at the 8 to 12 month mark for a true bob.
Several things can affect your personal timeline. Genetics play the biggest role in how fast your hair grows. Your diet, stress levels, and overall health also matter. If you have fine hair, it might appear to grow out faster because it falls into shape more easily. Thick or curly hair can take longer to look like a intentional style during the in-between phases.
People on hair care forums who have documented their full grow-out journeys consistently report reaching bob length between 6 months and 1 year. Most say the first 3 months are the hardest, and things get noticeably easier after month 4.
The key is setting realistic expectations from day one. This is a months-long commitment, not a weeks-long one. But every week brings visible progress if you know what to look for.
The 3 Pixie Cut Growth Stages: Month by Month
The pixie cut grow out stages are predictable. Every person goes through the same three phases, and each one has a name in the styling world. Knowing what stage you are in helps you pick the right styling strategy and trims.
Stage 1: The Baby Mullet (Months 0-3)
Welcome to the baby mullet stage. This is the first and usually most frustrating phase of growing out a pixie cut. Around 6 to 8 weeks after your last cut, the hair at the back of your neck (the nape) starts growing faster than the top and sides.
The result is what looks like a tiny, unintentional mullet. Business in the front, party in the back, except neither side looks like a party. The nape hair sticks out below the longer top sections, creating an uneven silhouette that drives people crazy.
This is the stage where most people give up and chop it all off again. Do not do it. The baby mullet is temporary, and there are specific styling fixes that make it manageable.
The biggest challenge here is the length mismatch between the nape and the rest of your head. Your best move is to get a nape-only trim to clean up the back while letting the top and sides continue growing. Texture spray and a slightly messy, piece-y look can also camouflage the unevenness.
Stage 2: The Shaglet (Months 3-6)
The shaglet stage is where things start getting interesting in a good way. By month 3 or 4, the sides have caught up to the top somewhat, and your hair resembles a short, layered shag. Hence the name: shaglet.
This stage is actually one of the more forgiving phases. The extra length gives you enough hair to start creating real styles. You can do side-swept looks, experiment with different partings, and start using clips and small accessories that actually have something to grip.
The main challenge during the shaglet phase is uneven texture and bulk in the wrong places. The back might still be thicker than the top, and the sides can create a mushroom-like shape if left alone. This is where a transition haircut from your stylist helps enormously.
A good shaglet styling move is to embrace the tousled, slightly undone look. Work a small amount of texturizing product through damp hair, rough-dry it with your hands, and let the natural separation do its thing. The shaglet looks best when it looks effortless.
Stage 3: The Micro-Bob (Months 6-12)
The micro-bob stage is the light at the end of the tunnel. By month 6 or so, most of your hair has reached a length where it naturally falls into a short bob shape. You are not at a full bob yet, but you are close enough that styling becomes much easier.
At this stage, the hair at the back is long enough to tuck behind your ears or style flat against your neck. The top has enough length for side-swept bangs or a center part. You can use a flat iron or small curling wand without struggling to grab sections.
The micro-bob is when you can finally see the destination. From here, it is just a matter of letting the length continue to grow until you reach your goal style. Most people reach a true chin-length bob between months 8 and 12.
The biggest tip for this stage: get a shaping cut around month 7 or 8 to even everything out into a proper bob silhouette. One good transitional cut can instantly transform months of awkward growth into a deliberate, polished look.
How to Style a Growing-Out Pixie at Every Stage
Styling is what separates a graceful grow-out from a chaotic one. The right techniques and products can make even the baby mullet stage look intentional. Here are the most effective styling strategies, organized by technique.
Texture Is Your Best Friend
If you take one thing from this guide, let it be this: texture spray will save your pixie grow out. Flat, freshly washed hair shows every uneven length and weird growth pattern. Textured, piece-y hair hides a multitude of sins.
Sea salt spray is the go-to product for creating that effortless, beachy texture that makes growing-out hair look styled rather than sloppy. Spritz it into damp hair, scrunch with your hands, and let it air dry or hit it briefly with a diffuser.
A texturizing spray or dry texture spray works on dry hair for instant grip and separation. Spray it at the roots and mid-lengths, then mess things up with your fingers. The goal is separation and movement, not a sleek, flat look.
For the shaglet and micro-bob stages, a light-hold pomade or styling cream applied to the ends adds definition without stiffness. Work a pea-sized amount between your palms and piece out individual sections.
Master the Tuck-Behind-the-Ears Look
Tucking your hair behind your ears is the single most useful styling move during the entire grow-out process. It works from the shaglet stage onward and instantly makes short, growing hair look neat and deliberate.
The trick is in the preparation. Start with slightly textured or day-old hair, since freshly washed hair tends to slip right back out. Apply a small amount of styling cream or light pomade to the sections behind your ears, then smooth them back and tuck.
For extra hold, use a couple of hidden bobby pins crossed in an X shape behind each ear. The pins disappear into the hair but keep everything in place all day. This works especially well for the sides, which tend to be the most unruly during the baby mullet and shaglet stages.
Parting Strategies That Redirect Growth
Changing your part is one of the easiest ways to completely change how growing-out hair looks. A deep side part adds instant volume and drama, and it works beautifully once you are past the baby mullet stage.
To create a deep side part, use a comb to draw a part from the highest point of your eyebrow toward the back of your head. Sweep the larger section over and add a small amount of volumizing powder at the roots for lift. This look adds sophistication and disguises uneven sides.
A middle part is bolder and works well once you reach the micro-bob stage. It gives a clean, modern look but requires fairly even length on both sides. If one side is still growing in, stick with a side part until things balance out.
Zigzag or messy parts are perfect for the awkward stages because they add texture and movement while hiding any length discrepancies. Just rake your fingers through your hair from the hairline back and let it fall naturally.
Slick-Back and Wet-Look Styling
The slick-back is a power move during the awkward phases. When nothing else is working, smoothing everything back with a styling gel or pomade makes you look like you meant to do this all along.
Start with damp hair. Work a medium-hold gel or styling cream through from roots to ends, then comb everything back away from your face. Let it set naturally or use a blow dryer on low to lock in the shape.
The wet look has been popular on runways and red carpets, so you are not cheating by using it. It looks deliberate and polished. Plus, it keeps every stray piece in place, which is exactly what you need when your hair is growing out at different rates.
For a softer version, use a styling cream instead of gel. This gives you the slicked-back shape with a more natural finish that works for everyday wear.
Bobby Pin Twists and Pinned Sections
Bobby pins are your secret weapon throughout the entire grow-out journey. Once you reach the shaglet stage, you have enough length to start pinning sections back in creative ways.
One simple style: twist a small section of hair from each temple and pin it at the back of your head with two crossed bobby pins. This pulls the sides away from your face and creates a pretty, half-up look that works for any occasion.
Another option is the flat pin twist. Take a section of hair above one ear, twist it flat against your head, and pin it in place. Repeat on the other side. This creates a crown-like effect that looks intricate but takes about 90 seconds.
Reddit users who have gone through the pixie grow out process swear by this technique. Multiple people reported that bobby pin twists got them through the worst of the baby mullet and shaglet phases when nothing else worked.
Use bobby pins that match your hair color, or go bold with metallic or colored pins for a statement look. Either way, they buy you weeks of styling options during the awkward middle stretch.
Headbands, Clips, and Accessories
Accessories are the easiest fix when your hair will not cooperate. A wide headband pushes all the growing-out hair off your face and looks intentional in seconds. This is especially helpful during the first 3 months when the hair is too short to style but long enough to look messy.
Thin fabric headbands work for everyday wear. Wider styles, padded bands, and knotted headbands add visual interest and can become your signature look during the transition.
Claw clips and small barrettes become useful starting around month 4. Once the back is long enough, you can do tiny half-up styles. Small pearl or metallic clips along the hairline add polish and keep pieces from falling in your face.
Silk scarves are incredibly versatile. Tie one around your head as a band, use it to hold back the growing sections, or wrap it into a headband style. Scarves add color and personality while serving a real functional purpose during the awkward stages.
How to Camouflage the Baby Mullet
The baby mullet does not have to look like a mullet. The secret is redirecting attention upward and adding texture that breaks up the length difference between the back and the top.
Start by applying a volumizing mousse or powder at the crown and roots. This lifts the top section, making it visually longer and fuller so it balances out the growing nape area. Blow dry upward at the roots to maximize the lift.
Then add texture throughout with sea salt spray or a texturizing powder. The messier and more separated the overall look, the less noticeable the length difference becomes. A sleek, flat style makes the mullet obvious, so avoid that.
Finally, get a nape trim. Cleaning up just the back by a quarter inch can make a huge difference without sacrificing overall progress. Your stylist can taper the nape so it blends more naturally into the longer top sections.
Hair Care Routine to Support Growth
How fast and how healthy your hair grows during the pixie transition depends heavily on your hair care routine. A healthy scalp and well-conditioned strands grow faster and look better during every stage. Here is what actually moves the needle.
Scalp Massage and Blood Circulation
Scalp massage is one of the simplest and most effective things you can do to support hair growth. Massaging your scalp increases blood circulation to the hair follicles, which delivers more oxygen and nutrients to the root of each strand.
Use your fingertips (not your nails) to massage your scalp in small circular motions for 3 to 5 minutes daily. You can do this on dry hair or while shampooing. Focus on the areas where you want the most growth, especially the nape and temples.
A silicone scalp massager tool makes this even easier and feels incredible. Use it in the shower with your shampoo for a spa-like experience that also stimulates follicles.
Deep Conditioning Treatments
Deep conditioning is essential during a pixie grow out. Your hair is going through a lot, and regular conditioner alone is not enough to keep the growing lengths healthy and strong.
Use a deep conditioning mask or treatment once a week. Apply it to clean, damp hair from the mid-lengths to the ends (and eventually the roots once you have enough length). Leave it on for 10 to 20 minutes, then rinse thoroughly.
Look for masks with ingredients like argan oil, shea butter, keratin, or amino acids. These penetrate the hair shaft to strengthen and moisturize from within, which reduces breakage and helps you retain every precious inch of growth.
Wash Less Frequently
Washing your hair every single day strips the scalp of natural oils that actually protect and nourish the hair shaft. During a grow-out, you want those oils working in your favor.
Aim to wash 2 to 3 times per week instead. On non-wash days, use a dry shampoo to absorb excess oil and add volume. This extends the time between washes and gives your scalp a chance to rebalance its natural oil production.
Less frequent washing also means less heat styling, less manipulation, and less breakage. All of that adds up to healthier hair that grows faster and looks better throughout the transition.
Rosemary Oil and Scalp Treatments
Rosemary oil has gained enormous popularity for hair growth, and for good reason. Multiple studies have shown that rosemary oil can be as effective as minoxidil for stimulating hair growth, likely by improving blood circulation to the scalp.
Rosemary oil is one of the most frequently recommended growth aids on hair care forums. Users consistently report visible improvements in growth rate and hair density when using it regularly.
To use rosemary oil for scalp health, mix a few drops of pure rosemary essential oil with a carrier oil like jojoba or coconut oil. Massage it into your scalp 2 to 3 times per week, leave it on for at least 30 minutes (or overnight), then shampoo it out.
Always do a patch test first to check for sensitivity. And remember, consistency matters more than quantity. A few drops massaged in regularly will give better results than a large amount used sporadically.
Nutrition: Vitamins and Supplements
What you put inside your body matters just as much as what you put on your hair. Hair growth requires specific nutrients, and deficiencies can slow things down significantly.
Focus on a diet rich in protein, iron, zinc, omega-3 fatty acids, and vitamins A, C, D, and E. Eggs, fatty fish, nuts, seeds, leafy greens, and sweet potatoes are all excellent foods for hair health.
Some people benefit from supplements during a grow-out. Biotin is the most popular hair growth supplement, though the science is mixed on its effectiveness for people who are not deficient. Silica and collagen supplements may also support hair strength and growth.
Talk to your doctor before starting any supplements. Bloodwork can identify specific deficiencies that might be slowing your hair growth, and targeted supplementation is far more effective than a scattergun approach.
Heat Styling Precautions
Excessive heat styling causes breakage, and breakage means you lose the growth you have worked so hard to achieve. During a pixie grow out, protecting your hair from heat damage is non-negotiable.
Always use a heat protectant spray or cream before applying any heat tool. This creates a barrier between the hair and the hot surface, reducing damage significantly.
Keep your flat iron and curling iron at or below 350 degrees Fahrenheit for fine hair and 400 degrees for thick hair. Avoid going over the same section multiple times. And try to limit heat styling to 2 or 3 times per week.
Air drying is your friend during this process. Not only does it prevent heat damage, but air-dried hair with the right products often looks better during the grow-out phases than blown-out hair.
Strategic Trims: Should You Cut While Growing Out?
Yes, you should still get trims while growing out a pixie cut. But not the kind of trims you might think. The goal is not to cut length off the top or front. The goal is to shape and balance the hair so the grow-out looks intentional at every stage.
Strategic trims are what separate a polished transition from a chaotic one. Here is exactly how to approach cutting during the grow-out.
The Nape Trim Strategy
The nape trim is the most important haircut you will get during the entire grow-out process. It involves trimming only the hair at the back of your neck to keep it from outpacing the rest of your head.
During the baby mullet stage, the nape grows faster than the top. Left alone, this creates the dreaded mullet shape. A nape trim every 4 to 6 weeks keeps the back clean and tapered while the top and sides continue growing.
This is a quick, targeted trim that takes 10 minutes. It does not sacrifice overall growth progress because you are only touching the back. Think of it as maintaining the silhouette while the important length catches up.
Keeping Sides Short While the Top and Back Grow
This is a strategy that real people on hair care forums swear by. The idea is to keep the sides relatively short while letting the top and back grow longer. This creates a disconnected, intentionally asymmetrical look rather than an accidental one.
The sides of a pixie are often the most stubborn during the grow-out. They stick out, curl under, or create weird wings. By keeping them trimmed shorter while the top grows over them, you create a layered look that appears deliberate.
This approach works especially well for people with straight or wavy hair. Once the top is long enough to sweep over the shorter sides, you have a stylish, modern look that transitions smoothly into a bob.
When to Get a Shape-Up vs. a Full Trim
Not every salon visit during the grow-out needs to involve a full haircut. Knowing when to ask for a shape-up versus a trim can save you months of regrowth time.
A shape-up is a light maintenance cut. Your stylist cleans up the edges, removes any stray pieces, and texturizes areas that have gotten bulky. No significant length is removed. Schedule a shape-up every 4 to 6 weeks during the first 6 months.
A full trim means removing a half inch or more to even out the overall shape. This is appropriate at transition points, like when you are moving from the shaglet stage to the micro-bob and want to create a cohesive bob silhouette.
The rule of thumb: if your hair is just looking messy, get a shape-up. If the shape is truly not working and you need a reset, a transitional trim is worth it.
Transition Haircuts That Help
Transition haircuts are specific styles designed to bridge the gap between a pixie and a bob. Rather than growing everything out evenly, you move through a series of intentional cuts that each look good on their own.
The first transition cut is usually around month 2 or 3. Your stylist might suggest a textured crop or a short shag that works with the current length rather than fighting against it. This immediately makes the grow-out look intentional.
The second transition cut happens around month 6 or 7. This is typically a pre-bob cut that shapes the growing hair into something resembling a bob, even if it is shorter than your final goal. This single cut can transform months of awkward growth.
Work with a stylist who understands transition cuts. Not every stylist thinks about growing hair out strategically. Ask them specifically about transition cuts and whether they have experience with pixie grow-outs.
Finding a Stylist Who Understands Grow-Outs
The right stylist can make the difference between a smooth transition and a frustrating one. You need someone who understands that the goal is growing, not cutting, and who can shape your hair strategically without taking off too much.
When booking, mention that you are growing out a pixie and want strategic maintenance cuts. Ask if they have experience with transition cuts and grow-out shaping. A good stylist will get excited about the project and have a plan.
Be clear about your goals. Tell them you want to preserve length on top and at the front, and that trims should focus on the nape, sides, and overall shape. A communication breakdown at the salon can set you back weeks.
Hair Type-Specific Grow-Out Advice
Not all hair grows out the same way. Your hair texture changes how each stage looks and which styling techniques work best. Here is specific advice for the three most common hair types.
Straight Hair: Building Volume and Movement
Straight hair shows every length difference during the grow-out. There is no natural texture to hide behind, so the baby mullet stage can look especially stark and obvious.
Your best strategy is adding volume and movement. Use volumizing mousse at the roots, blow dry with a round brush for lift, and finish with texturizing spray. The more body you create, the less noticeable the uneven lengths become.
Avoid heavy, greasy products that weigh straight hair down. Light-hold products, dry shampoo for grit, and sea salt spray for texture are your go-tos. Flat iron waves also add movement that camouflages the grow-out.
Wavy Hair: Embracing Natural Texture
Wavy hair is arguably the easiest texture to grow out. The natural wave creates movement and dimension that naturally disguises uneven lengths and awkward growth patterns.
Embrace your natural texture rather than fighting it. Use curl-enhancing cream or mousse on damp hair, scrunch gently, and let it air dry or diffuse. The wave pattern does a lot of the styling work for you.
The main challenge with wavy hair during grow-out is the sides, which can flip out at odd angles. Use a small amount of styling cream to smooth those sections down, or pin them behind your ears while they grow out.
A diffuser attachment on your blow dryer enhances natural waves and adds volume at the root. This is especially useful during the shaglet stage when you want the hair to look full and intentional.
Curly and Coily Hair: Managing Shrinkage and Shape
Curly and coily hair presents a unique challenge during pixie grow out: shrinkage. Your hair might be significantly longer than it appears when dry, which affects your styling options and your timeline perception.
The key is working with your curl pattern rather than against it. Use leave-in conditioner and curl cream to define your curls, and let the natural shape guide your style. Curly hair often looks shorter but fuller, which can actually work in your favor during the transition.
Shape is critical for curly grow-outs. Because curls spring up unevenly, strategic shaping cuts are even more important. Find a stylist who specializes in curly hair and understands how to shape it during a grow-out.
Deep conditioning is extra important for curly and coily hair, which tends to be drier. Weekly masks, leave-in treatments, and scalp oiling all help maintain moisture and support healthy growth throughout the transition.
Staying Patient: Getting Through the Frustrating Days
Nobody talks about the emotional side of growing out a pixie cut, but it is real. There will be days when you hate your hair, days when you want to chop it all off, and days when you question every decision that led you here.
This is completely normal. Every single person who has grown out short hair has felt this way. The frustration is not a sign that something is wrong. It is part of the process.
Here is what helps. First, take progress photos every 2 weeks. When you are in the middle of it, you cannot see the changes. Looking back at photos from a month ago reminds you that growth is happening even when it does not feel like it.
Second, remember that every stage is temporary. The baby mullet that drives you crazy today will be a memory in 6 weeks. The shaglet that feels impossible will be a bob before you know it.
Third, consider extensions or a hair topper if the frustration becomes too much. Halo extensions and clip-in toppers can give you the look of longer hair instantly while your real hair grows underneath. There is no shame in using tools to get through the tough phases.
You have done the hard part already. You got the pixie cut in the first place. Growing it out is just the next adventure.
FAQs
How to style awkward growing out pixie?
The best ways to style an awkward growing-out pixie include using texture spray to create piece-y separation, slicking hair back with styling cream or gel, tucking sides behind the ears with hidden bobby pins, and accessorizing with headbands or clips. Embracing a messy, textured look hides uneven lengths better than trying for a sleek finish.
How do you gracefully grow out a pixie cut?
To gracefully grow out a pixie cut, get strategic nape trims every 4 to 6 weeks to keep the back from outpacing the top, use texture and styling products to disguise uneven lengths, change your part to redirect hair growth, and work with a stylist on transition cuts at months 3 and 6. Patience and consistent care are key.
How long does it take to grow out a short pixie cut?
It takes approximately 6 to 12 months to grow out a short pixie cut into a bob. Hair grows about half an inch per month, so reaching chin-length from a typical pixie requires 5 to 7 inches of growth. Most people reach the shaglet stage by month 3, the micro-bob stage by month 6, and a full bob by month 8 to 12.
How to get past the awkward stage of hair growth?
To get past the awkward stage of hair growth, focus on strategic styling: use sea salt spray and texturizing products to create intentional messiness, get nape-only trims to control the back, experiment with deep side parts to add volume, use bobby pins to twist and pin unruly sections, and accessorize with headbands or scarves on bad hair days.
How to grow out a pixie cut without cutting it?
To grow out a pixie cut without cutting it, rely heavily on styling techniques like slicking hair back, tucking behind ears, using texture spray for camouflage, and accessorizing with headbands and clips. Keep in mind that strategic nape trims actually help the grow-out look better without sacrificing overall length progress.
What does a pixie cut look like grown out?
A pixie cut grown out goes through three distinct visual stages. At months 0 to 3, it looks like a baby mullet with the nape longer than the top. At months 3 to 6, it resembles a short layered shag called a shaglet. By months 6 to 12, it takes on a micro-bob shape that eventually grows into a full chin-length bob.
Final Thoughts on Growing Out Your Pixie
Learning how to grow out a pixie cut through the awkward stages comes down to three things: understanding the timeline, mastering the right styling techniques, and staying patient through the process.
The baby mullet, the shaglet, and the micro-bob are all temporary. Each one has its own styling solutions, from texture spray and bobby pins to strategic nape trims and transition cuts. With the right routine for your hair type and a stylist who understands the journey, every stage can look intentional.
Your hair is growing right now, half an inch every month, whether you can see it or not. Take progress photos, be kind to yourself on the bad days, and remember that the bob is waiting for you at the finish line. You have got this.