
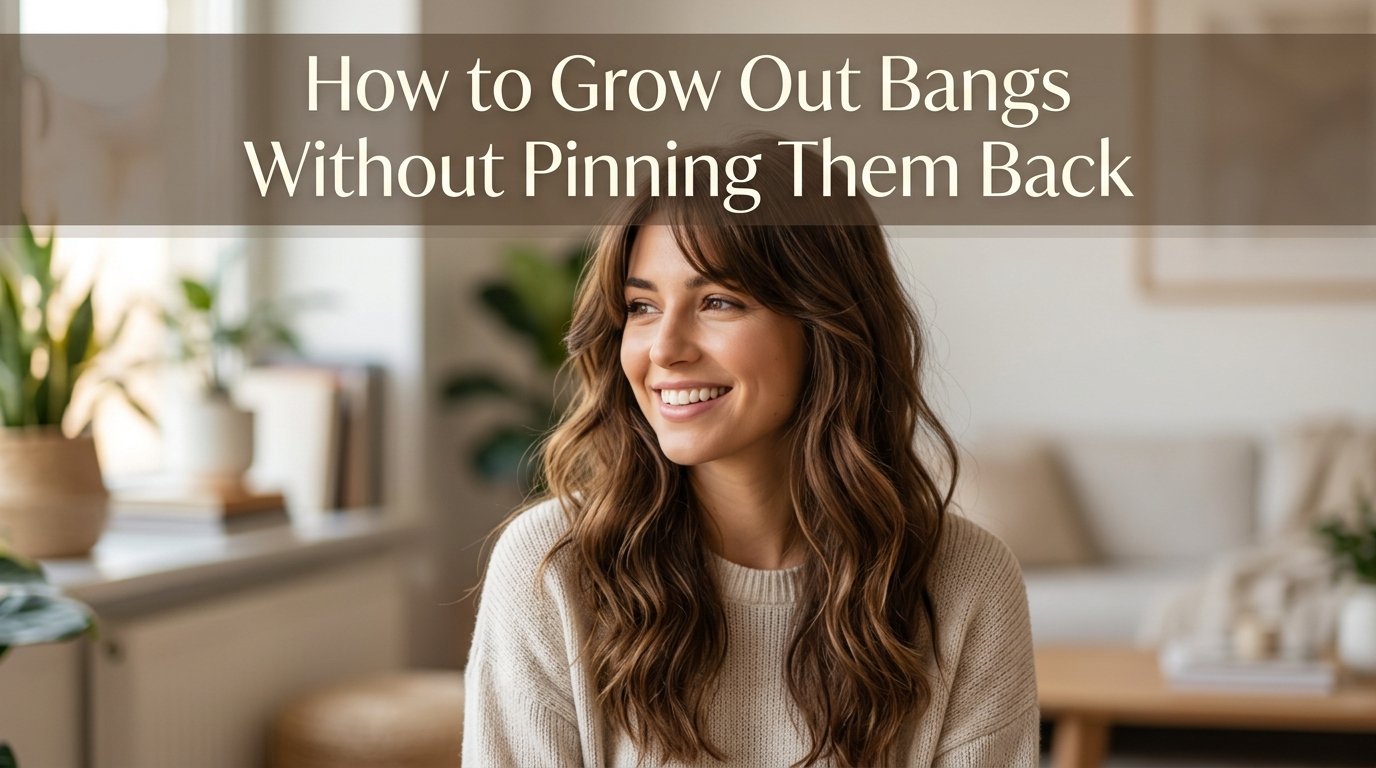
You said goodbye to your bangs. Now you are staring at the mirror wondering what you were thinking.
If you are deep in the awkward stage right now, I want you to know something. Every single person who has ever grown out bangs has stood exactly where you are. The hair falls in your eyes. It will not cooperate. You reach for the bobby pins again and feel like that is your only option.
Here at Mercer Street Salon, we have guided hundreds of clients through this exact transition. And I can tell you with confidence: learning how to grow out bangs without pinning them back every day is absolutely possible. It just takes the right techniques, the right mindset, and a little patience with yourself.
The awkward phase is that frustrating window where your bangs are too long to wear as bangs but too short to blend with the rest of your hair. It typically peaks between weeks three and eight. During that time, the hair seems to have a mind of its own. It flops. It separates. It lands right in your eyelashes at the worst possible moment.
But here is the good news. You do not have to suffer through months of bad hair days. There are dozens of styling hacks that make growing out bangs feel intentional and put-together rather than accidental and messy. Some take thirty seconds. Others take five minutes. None of them require you to shove bobby pins into your hair every single morning.
This guide walks you through the entire journey from a salon professional’s perspective. I will cover what to expect at each growth stage, twelve styling techniques that actually work, hair-type-specific advice, tips for keeping your hair healthy during the process, and exactly what to tell your stylist when you go in for a trim.
By the end, you will have a complete toolkit for surviving the awkward phase and coming out the other side with beautiful, blended, face-framing hair. Let us get into it.
Table of Contents
Quick Guide: Best Techniques by Growth Stage
Before we get into detailed tutorials, here is a quick reference guide. Different growth stages call for different approaches, and knowing which technique works best for your current length saves you a lot of frustration.
Stage 1 (Weeks 1 to 4): Too Short to Tuck. Your bangs are right at or slightly past your eyebrows. They cannot reach your ears yet. Best techniques: the blow-dried bend, side part switch, slicked-back ponytail, and headband styles. At this stage, you are redirecting the hair rather than trying to pin it.
Stage 2 (Weeks 5 to 8): The Awkward Middle. This is the hardest stretch. Your bangs graze your cheekbones but will not stay tucked behind your ears. Best techniques: Dutch braid integration, side twists, the half-up bun, claw clip styles, and decorative clips. These methods use the length you have to create intentional-looking styles.
Stage 3 (Weeks 9 to 16): Almost Blendable. Your bangs reach your jawline or just past it. They can almost tuck behind their ears. Best techniques: tousled waves, transitioning to curtain bangs, face-framing ponytail, and blow-dried curtain bangs. Now you can start working with your natural texture.
Stage 4 (Weeks 16 and Beyond): Blended and Beyond. Your bangs have merged with the rest of your hair. Best techniques: face-framing layers from your stylist, natural styling, and celebrating the fact that you made it.
How Long Does It Take to Grow Out Bangs?
This is the question we hear most often at the salon. And the honest answer is: it depends on your starting length, your natural growth rate, and your goal length.
On average, hair grows about half an inch per month. Some people grow closer to a quarter inch. Others grow up to three-quarters of an inch. Genetics, diet, age, and overall health all play a role. But half an inch per month is the benchmark most stylists use.
Let me break down realistic timelines based on where your bangs start and where you want them to end up.
If you have blunt straight-across bangs that sit at your eyebrows, you are looking at roughly three to four months to reach nose length. That is the point where the worst of the awkward stage starts to ease. Getting to chin length takes about six to eight months. And full integration with mid-length or long hair? Plan on eight to twelve months.
Side-swept bangs are a different story. They already grow at an angle, so the transition feels less dramatic. Most side bangs blend into face-framing layers within three to five months. Curtain bangs are even easier to grow out because they are designed to sweep outward from the start.
The awkward stage itself, that window where the hair feels impossible to manage, typically lasts six to eight weeks. It peaks around week four when the bangs are too long for their original shape but not long enough to redirect. This is when most people give up and cut them. If you can push through weeks three through eight, the rest becomes noticeably easier.
A few factors can slow down your progress. Heat damage from daily blow-drying or flat ironing causes breakage that eats away at your gains. Nutritional deficiencies, particularly iron, vitamin D, and protein, can slow hair growth. Stress and hormonal shifts also play a role. If you feel like your hair is barely growing, it may be worth looking at these factors.
The most important thing to remember: your bangs are growing at the same rate as the rest of your hair. They do not grow slower. They just feel slower because every millimeter of growth is right there on your face, visible and noticeable every single day.
How to Grow Out Bangs Without Pinning Them Back Every Day: 12 Styling Hacks
Here is where things get practical. I am going to walk you through twelve styling techniques that work at various stages of the grow-out process. Some of these you can do in under a minute. Others take a little more effort but give you a completely different look.
The goal is to have a rotation of three or four go-to styles so you are not doing the same thing every day. Variety keeps the process from feeling monotonous and lets you match your hair to your mood, your outfit, and your schedule.
1. The Blow-Dried Bend
This is the single most useful technique during the first six weeks of growing out bangs. Instead of fighting the hair, you redirect it with a round brush and blow dryer.
Start with damp bangs. Take a small round brush, about one inch in diameter. Place it under the bangs at the root and pull downward while directing warm air from your blow dryer. As you reach the ends, roll the brush upward and to the side. This creates a soft bend that sweeps the bangs away from your face without needing pins.
The key is to over-direct the hair. Pull the brush in the opposite direction from where you want the hair to fall. If you want your bangs sweeping left, pull them hard to the right while drying. When you release, they settle into a natural-looking sweep.
Finish with a blast of cool air to set the shape. A light mist of hairspray at the roots, not the ends, keeps the bend in place all day. This technique works on all hair types, though fine hair may need a texturizing spray at the roots for extra grip.
2. The Side Part Switch
Sometimes the simplest solution is the most effective. Switching from a middle part to a deep side part instantly changes how your growing bangs fall.
A deep side part shifts the bulk of your bangs to one side of your face. Instead of hanging straight down over your forehead, the hair sweeps across at an angle. This works best once your bangs reach the outer corner of your eyebrow, usually around week three or four.
To create a strong side part, use the end of a tail comb to draw a clean line from your crown down to your hairline. Aim for the highest point of your eyebrow, which creates the most flattering angle. Push the hair over and smooth it down.
If the hair resists staying put, a tiny amount of styling cream or pomade on your fingertips helps weigh it down. Avoid heavy gels at this stage because they make short pieces look greasy and separated. A light cream gives control without that stiff, product-heavy look.
The side part works beautifully for straight and wavy hair. For curly hair, finger-comb the part into place and let your natural texture do the rest.
3. Dutch Braid Integration
The Dutch braid is a favorite on Reddit hair forums for good reason. It pulls the bangs completely out of your face and incorporates them into a style that looks deliberate and polished.
A Dutch braid is essentially a reverse French braid. Instead of crossing the strands under, you cross them over. This makes the braid sit on top of the hair rather than tucking under it, creating a raised, textured look that grips short bang pieces securely.
Start at your hairline on one side. Take a small section that includes your bangs. Split it into three pieces and begin braiding, crossing the outer strands over the middle. As you work down the side of your head, add small sections of hair from both sides.
The beauty of this technique is that it works even when your bangs are very short. You can start the braid right at the hairline and the bang pieces get woven in immediately. By the time you reach your ear, the bangs are completely contained.
Finish the braid at the nape of your neck and secure it with a clear elastic. You can leave it as a single side braid, wrap it into a bun, or pin it across the back of your head for a half-up style.
This works on all hair types. For fine hair, gently pull the braid apart after securing to make it look thicker. For thick hair, the braid will be substantial and bold on its own.
4. Side Twists and Twisted Sections
If a full braid feels too complicated, side twists are the easiest alternative. They take about fifteen seconds and require zero skill.
Take a section of your bangs on one side, about an inch wide. Twist it away from your face, adding small pieces of hair as you work down toward your ear. The twist naturally picks up your bangs and pulls them to the side. Pin the twist at the back of your head or behind your ear with a bobby pin.
You can do this on both sides for a symmetrical look, twisting each side back and meeting in the middle. Or keep it one-sided for an asymmetric, effortless vibe.
The trick to making twists stay is the direction of rotation. Always twist away from your face. This makes the hair lie flat against your head rather than popping out. If your twists keep unraveling, your sections may be too large. Smaller sections hold better.
Side twists are perfect for Stage 2 when your bangs are at cheekbone length. They look intentional and styled while solving the problem of hair in your face.
5. The Half-Up Bun / Mini Top Knot
The half-up bun is a lifesaver during the mid-awkward stage. It pulls the front sections of your hair, including your bangs, up and away from your face in a style that looks trendy rather than desperate.
Gather the top section of your hair, from your temples up to your crown. Include your bangs in this section. Twist it into a small bun at the top or back of your head and secure with a hair tie or a few bobby pins.
The mini version is perfect when your bangs are still short. Take just the bang section and the inch of hair behind it. Twist it into a tiny knot and pin it. It creates a small, deliberate detail at the top of your head that reads as a styling choice.
For fine hair, pulling the bun apart slightly adds volume. For thick hair, wrap the bun tighter and use two hair ties for extra security. If the shorter bang pieces will not reach the bun, twist them first and then incorporate them.
This style works for casual settings, workouts, and even the office if you keep it neat. It is one of the most versatile options on this list.
6. Claw Clip Styles
Claw clips have made a massive comeback, and they are perfect for growing out bangs. The clip holds hair more gently than an elastic and creates effortless-looking updos.
Once your bangs reach about three inches in length, you can start incorporating them into claw clip styles. Gather your bangs along with the front sections of your hair. Twist them back and clip them at the crown or the back of your head.
For a French twist variation, twist the entire section upward and tuck the ends under before clipping. This creates a sleek, sophisticated look that works well for professional settings.
The key with claw clips is choosing the right size. A clip that is too large will not grip short sections. A clip that is too small will not hold enough hair. Look for a medium clip with strong teeth for best results during the grow-out phase.
Claw clips work especially well for thick and wavy hair. The texture gives the clip something to grab onto. For fine, silky hair, add a bit of dry shampoo or texturizing spray first to create grip.
7. The Slicked-Back Ponytail
When your bangs are short and absolutely will not cooperate, sometimes the answer is to lean into it. The slicked-back look takes those stubborn short pieces and turns them into a deliberate style statement.
Apply a small amount of styling gel or pomade to damp bangs. Use your fingers or a comb to smooth the hair straight back from your hairline. The product holds the short pieces flat against your head.
For the full effect, gather all of your hair into a sleek ponytail at the crown or nape of your neck. The slicked-back front combined with the ponytail creates a clean, athletic, polished look.
Choose your product based on your desired finish. A lightweight gel gives a natural look with light hold. A strong-hold pomade gives a wet-look finish that lasts all day. A styling cream gives a soft, piecey texture that is less severe.
This technique works best on Stage 1 and Stage 2 bangs. Once the hair gets longer, the slicked-back look becomes harder to maintain because there is too much length to keep flat.
8. Tousled Waves and Beach Texture
Sometimes the best way to hide growing-out bangs is to add texture to all of your hair. When everything looks tousled and lived-in, the bangs simply become part of the overall style rather than standing out.
Use a curling wand or flat iron to create loose waves throughout your hair. Wrap sections around the barrel without clamping, leaving the ends out for a modern, undone look. Break up the curls with your fingers.
For your bangs, wrap them around the wand in the direction you want them to sweep. The curl gives them shape and movement, and they blend into the waves around them rather than hanging straight and obvious.
Finish with a texturizing spray or sea salt spray. These products add grip and separation, making the bangs look like intentional pieces rather than grow-out stragglers.
This technique shines during Stage 3 when your bangs are long enough to wrap around a styling tool. For wavy and curly hair types, this is practically effortless because your natural texture does most of the work.
9. Transitioning to Curtain Bangs
Curtain bangs are the ideal end goal for many people growing out straight-across bangs. They sweep outward from a center part, framing the face on both sides. And they are much easier to maintain and grow out than blunt fringe.
You can start working toward curtain bangs as early as Stage 2. Create a center part. Take your bangs and use a round brush to blow-dry them outward on each side. The brush should move from the center of your forehead toward your temples, following the natural curve of your hairline.
If your bangs are not long enough to reach your temples yet, focus on just creating the outward direction at the roots. Use the blow dryer to push the hair away from center. Even a slight outward curve sets the foundation for curtain bangs as the hair grows.
Once the hair reaches cheekbone length, the curtain shape becomes more defined and natural. At that point, a stylist can cut a few longer pieces to enhance the curtain shape and help everything blend.
This transition works for all hair types. Wavy and curly hair gets a softer, more romantic curtain effect. Straight hair gets a sleek, face-framing sweep. Fine hair benefits from the volume that the outward direction creates at the roots.
10. Headband Styles
Headbands are the ultimate no-effort solution for growing out bangs. They push the hair off your face instantly and come in enough styles to match any outfit or occasion.
For a sleek look, place a headband right at your hairline. Push your bangs underneath it so they lie flat against your forehead. This works best with wider headbands that cover more surface area.
For a softer look, place the headband slightly back from your hairline. Let your bangs pouf slightly in front of it. This creates a relaxed, bohemian vibe that looks intentional rather than like you are hiding something.
For maximum hold during Stage 1, combine a headband with the slicked-back technique. Apply a small amount of styling cream, smooth the bangs back, and place the headband over them. Nothing is moving.
Choose headbands based on your setting. Sleek plastic or metal bands work for the office. Fabric or knotted headbands are perfect for casual weekends. Thin, decorative bands add a touch of style without covering much hair.
11. The Face-Framing Ponytail
A face-framing ponytail is a simple way to pull most of your hair back while leaving strategic pieces out to blend with your growing bangs.
Pull your hair into a low or mid-height ponytail. Leave your bangs and a few face-framing sections loose around your face. The loose pieces create a soft frame that draws attention away from the bangs themselves.
If your bangs are at different lengths, this style actually helps. The variation looks deliberate when mixed with intentionally loose sections. It reads as a face-framing design choice rather than a grow-out phase.
Use a small amount of styling cream on the loose pieces to smooth flyaways. If your bangs are long enough, curl them with a small wand or wrap them around your finger while damp to create a bend that sweeps away from your face.
This style works well for Stage 2 and Stage 3. It is office-appropriate, gym-friendly, and easy to dress up for evening with the right accessories.
12. Decorative Clips and Barrettes
One of the most common complaints on hair forums is that growing out bangs feels like hiding. Decorative clips flip that script. They turn the process into a styling choice that looks bold and intentional.
Colored bobby pins are a perennial favorite. Instead of hiding them, place three or four in a row or a geometric pattern on one side of your head. They pin the bangs back while adding a graphic, modern element to your look.
Pearl or jeweled barrettes work for more formal settings. Clip a small section of bangs to the side with a decorative piece and suddenly the style looks like an accessory choice, not a necessity.
Claw clips in fun colors or patterns serve double duty. They hold the hair and add visual interest. Small claw clips placed strategically along a twist or braid keep short pieces contained while looking decorative.
This technique works at every stage. When your bangs are very short, a single decorative clip can hold the front pieces. When they are longer, clips can secure twists, braids, and pulled-back sections.
Styling by Hair Type: Straight, Wavy, Curly, Fine, and Thick
Not every technique works the same way for every hair type. Your texture determines which styles will hold, which products to use, and which challenges you will face during the grow-out process.
Straight Hair
Straight hair is both a blessing and a curse during bang grow-out. The good news is that straight hair responds beautifully to round brush styling and blow-dried bends. You can create precise sweeps and clean parts that hold all day.
The challenge is that straight hair shows every inconsistency. If your bangs are growing at slightly different rates, the variation is obvious. Flyaways and cowlicks are also more visible on straight hair.
Best techniques: blow-dried bend, side part switch, slicked-back ponytail, and transitioning to curtain bangs. Use lightweight styling creams and light-hold hairsprays. Heavy products weigh straight hair down and make it look greasy fast.
Wavy Hair
Wavy hair is uniquely challenging during the awkward stage because the bangs often develop an unpredictable bend. One side might wave nicely while the other flips the wrong direction.
Embrace the texture rather than fighting it. Tousled waves are your friend. Use a curling wand to define the wave pattern in your bangs and blend them with the rest of your hair. Sea salt spray enhances natural waves and makes the grow-out look intentional.
Best techniques: tousled waves, side twists, Dutch braid, and claw clip styles. Avoid flat ironing your bangs straight because the contrast with your wavy hair makes them stand out more. Work with the wave instead.
Curly Hair
Curly bangs are having a major moment, and growing them out can be a beautiful process if you work with your curl pattern. The key is moisture and definition.
Curly bangs shrink significantly when they dry. What looks like it needs trimming wet may be the perfect length once it coils. Always style curly bangs when soaking wet with a curl cream or defining gel.
Use a diffuser on low heat to dry your bangs, scrunching upward to encourage curl formation. Once dry, do not touch them. Handling dry curly bangs causes frizz and separates the curl clumps.
Best techniques: curly mop top, headband styles, side twists, and the half-up bun. Deep conditioning is extra important for curly hair during grow-out because dry, brittle curls break easily and slow your progress.
Fine Hair
Fine hair can look sparse and wispy during the grow-out phase. The bangs may not have enough weight to stay put, making them prone to floating and separating.
The solution is to create the illusion of fullness. Avoid heavy products that flatten fine hair. Instead, use dry shampoo at the roots for grit and volume. Texturizing sprays add body without weight.
Best techniques: blow-dried bend with root lifting, the half-up bun, side twists, and decorative clips. Avoid slicked-back styles that require heavy product because they make fine hair look flat and thin. Dutch braids can look beautiful on fine hair if you pull them apart gently to create thickness.
Thick Hair
Thick hair has the opposite challenge. There is so much of it that growing-out bangs can feel overwhelming and bulky. The hair has plenty of weight to stay in place, but it can also look heavy and dense.
Thinning shears can help, but only if used by a professional. Do not attempt to thin your own bangs at home. Your stylist can remove bulk from the underside of the bangs without changing the visible length.
Best techniques: Dutch braid, claw clip styles, slicked-back ponytail, and face-framing ponytail. Thick hair holds braids and updos beautifully, making these styles reliable during the awkward stage. Use medium-hold products that tame without flattening your natural volume.
How to Promote Faster, Healthier Hair Growth
You cannot magically make your bangs grow two inches in a week. But you can create the conditions for your hair to grow at its maximum natural rate. Healthy hair grows faster than damaged hair, so the focus should be on keeping your hair in the best possible condition during the grow-out process.
Scalp Care and Massage
A healthy scalp is the foundation of healthy hair growth. Spend two to three minutes massaging your scalp each time you wash your hair. Use your fingertips, not your nails, and work in small circular motions.
Scalp massage increases blood flow to the hair follicles, which delivers more nutrients and oxygen. Some studies suggest regular scalp massage can increase hair thickness over time. It also feels fantastic and helps you relax, which reduces stress-related hair shedding.
Deep Conditioning Routine
Deep conditioning once a week keeps your hair hydrated and flexible, which prevents the breakage that slows your visible progress. Look for a deep conditioner or hair mask with moisturizing ingredients like shea butter, argan oil, or coconut oil.
Apply the mask to damp hair from mid-length to ends. Avoid the roots and scalp unless your scalp tends to be dry. Leave it on for fifteen to twenty minutes under a shower cap. The heat from your scalp helps the product penetrate.
During bang grow-out, pay special attention to the ends of your bangs. They are the oldest part of the growing hair and the most prone to split ends. A tiny amount of leave-in conditioner on the tips keeps them from splitting and breaking off.
Sulfate-Free Shampoo Benefits
Sulfates are harsh detergents that strip natural oils from your hair and scalp. Switching to a sulfate-free shampoo helps maintain moisture balance and reduces dryness that leads to breakage.
Sulfate-free formulas clean gently without the aggressive foaming action of traditional shampoos. They may feel different at first because they do not lather as much, but they are significantly gentler on your hair.
Wash your hair two to three times per week rather than daily if possible. Over-washing strips oils that your scalp produces to protect and condition the hair. On non-wash days, dry shampoo absorbs excess oil at the roots.
Split End Prevention
Split ends travel up the hair shaft if left untreated, causing breakage that erases your growth progress. You cannot repair split ends once they form, but you can prevent them.
Minimize heat styling. When you do use hot tools, always apply a heat protectant first. Avoid brushing wet hair, which is when it is most fragile and prone to stretching and breaking. Use a wide-tooth comb on damp hair instead.
Silk or satin pillowcases reduce friction while you sleep, which prevents tangles and breakage. Cotton pillowcases create friction that can rough up the hair cuticle overnight. A silk pillowcase is a small investment that pays off in hair health.
Diet and Hydration
Hair is made of a protein called keratin. Your body needs adequate protein, iron, zinc, and vitamins to produce healthy hair. A balanced diet with plenty of protein-rich foods supports steady growth.
Foods that support hair health include eggs, salmon, avocados, nuts, seeds, leafy greens, and sweet potatoes. If you suspect a nutritional deficiency may be slowing your hair growth, talk to your doctor about blood work to check iron, vitamin D, and thyroid levels.
Hydration matters too. Dehydrated hair becomes brittle and prone to breakage. Drink plenty of water throughout the day and use hydrating hair products to keep moisture levels up from the inside and outside.
Heat Styling Damage Control
Daily heat styling is the fastest way to damage growing bangs. Every blow-dry, flat iron pass, and curling wand session causes cumulative damage to the hair cuticle.
When you must heat style, use the lowest effective temperature. Fine hair needs 250 to 300 degrees. Medium hair needs 300 to 350. Thick or coarse hair may need 350 to 400, but never go above 400 degrees.
Always use a heat protectant spray or cream before applying any hot tool. This creates a barrier between the hair and the heat, reducing damage by up to fifty percent. Air dry your hair when possible and embrace heatless styling techniques.
What to Tell Your Stylist About Growing Out Bangs
This is where our salon perspective really matters. We see clients every week who are growing out bangs, and there is a right way and a wrong way to handle trims during this process.
When to Get a Trim vs. When to Leave It Alone
The general rule: if your ends look healthy and your bangs are blending reasonably well, leave them alone. Every trim sets your progress back by a few weeks.
However, if your ends are splitting, if your bangs have a harsh line that will not blend, or if you are so frustrated that you are considering cutting them all off, a strategic trim can save your grow-out journey.
A professional trim during grow-out should only remove damaged ends. We are talking about a quarter inch or less. The goal is maintenance, not length reduction.
What to Ask For
When you book your appointment, tell your stylist you are growing out your bangs and want help blending them. Ask for face-framing layers that start at the length your bangs have reached. These layers create a gradual transition from your bangs to the rest of your hair.
You can also ask your stylist to texturize the ends of your bangs. Point cutting or using thinning shears on the very tips softens the blunt line and makes the bangs blend more naturally with surrounding hair.
If you want to transition to curtain bangs, tell your stylist. They can cut the center pieces slightly shorter than the outer pieces, creating the sweep that defines curtain bangs. This is a great intermediate step that looks intentional while you continue growing.
What NOT to Let Your Stylist Do
Be clear about your goals. If your stylist reaches for the scissors and starts talking about reshaping your bangs into a fresh fringe, stop them. Politely but firmly remind them that you are growing the bangs out and do not want the length reduced.
Do not let anyone cut a blunt line across your bangs. This resets the clock entirely. Also be cautious about heavy face-framing layers that remove too much hair. Light layers help blend; heavy layers can create a shelf that looks worse than the grow-out.
If your stylist seems resistant to your grow-out goals, find a new stylist. A good professional supports your hair journey and works with you, not against you.
Growing Out Bangs Over 40 and Over 50
Hair changes as we age. It often becomes finer, drier, and sometimes slower to grow. If you are growing out bangs in your forties or fifties, a few adjustments can help.
Focus heavily on moisture. Mature hair needs richer conditioning products and more frequent deep treatments. Consider a hydrating oil or serum applied to damp ends daily.
Side-swept styles and curtain bang transitions are particularly flattering for mature faces. They soften the forehead area and draw attention to your eyes and cheekbones. Avoid severe slicked-backed looks that can emphasize fine lines.
Talk to your stylist about the best face-framing approach for your face shape and hair texture. A salon professional can customize the grow-out strategy to complement your features.
Surviving the Awkward Stage at Work and School
One of the biggest stressors during bang grow-out is feeling self-conscious in professional and social settings. You want to look polished and put-together, not like you are in the middle of a hair crisis.
Polished Styles for the Office
For work settings, aim for styles that look deliberate. The blow-dried bend paired with a clean side part reads as professional and intentional. A low claw clip style or a sleek low ponytail with face-framing pieces also works beautifully.
Avoid anything that looks like you are hiding your hair. Massive headbands or obvious pinning patterns can look juvenile in a corporate environment. Instead, choose styles that integrate the bangs into the overall look.
Quick Fixes for Bad Hair Mornings
Some mornings your bangs will not cooperate. Have a backup plan ready. A sleek ponytail with gel-smoothed bangs takes ninety seconds and looks clean and intentional. A side twist pinned at the back takes fifteen seconds and pulls everything off your face.
Keep dry shampoo and a small travel-size hairspray in your desk or bag. A midday refresh with dry shampoo absorbs oil that makes growing bangs separate and look stringy. A quick mist of hairspray tames flyaways that develop throughout the day.
Confidence Tips for Self-Conscious Moments
Here is the truth that nobody tells you: almost nobody notices your grow-out phase as much as you do. You stare at your bangs in the mirror every morning. You see every stray piece. Other people see your overall look, your smile, your confidence.
Wear styles that make you feel good. When you feel confident, you project confidence, and that changes how people perceive you. The decorative clips, the intentional braids, the curtain bang sweep, these all signal that your hair is a choice, not an accident.
If you are really struggling, schedule a mid-grow-out salon visit for a blowout. A professional blow-dry can transform your bangs for three to four days and remind you that your hair is capable of looking great even in transition.
Common Mistakes to Avoid When Growing Out Bangs
Over years of helping clients grow out bangs, we have seen every mistake in the book. Here are the most common ones and how to avoid them.
Trimming too much yourself. This is the number one mistake. You grab the kitchen scissors, tell yourself you are just cleaning up the ends, and suddenly you have cut a full inch off. Now you are back to square one. Put the scissors down. If your bangs need attention, go to a professional.
Using too much product. More is not better, especially on short bangs. Heavy gels and thick creams weigh the hair down and make it look greasy. Start with a pea-sized amount and add more only if needed. You can always add, but you cannot take away.
Giving up too early. The hardest part of the grow-out is weeks three through eight. This is when most people cave and cut their bangs. If you can push through this stretch, the rest becomes dramatically easier. Set a goal date, say three months from now, and commit to not touching the scissors until then.
Ignoring hair health. Damaged hair breaks, and breakage erases your progress. If you are heat styling every day without protectant, skipping conditioner, and never deep treating, your bangs are fighting to grow while simultaneously breaking off. Prioritize hair health throughout the process.
Choosing the wrong accessories. Cheap bobby pins that bend and lose tension. Headbands that slip and slide. Claw clips that snap under thick hair. Invest in quality accessories that actually hold your hair. It makes a massive difference in how your styles look and last.
FAQs
How long does it take bangs to fully grow out?
On average, bangs take three to six months to grow out enough to blend with the rest of your hair. Hair grows about half an inch per month. If your bangs start at eyebrow length, expect three to four months to reach nose length and six to eight months to reach chin length. Factors like genetics, diet, and hair health can affect your individual growth rate.
Can you trim bangs while growing them out?
Yes, but only to remove split ends or damaged tips. Ask your stylist for a micro-trim of a quarter inch or less. The goal is maintenance, not length reduction. You can also ask for face-framing layers or texturizing at the ends to help your bangs blend with surrounding hair during the grow-out process.
Do bangs grow slower than the rest of your hair?
No, bangs grow at the same rate as the rest of your hair, approximately half an inch per month. They feel slower because the growth is right on your face and visible every day. Even a millimeter of growth is noticeable on bangs, while the same growth on the back of your head goes unnoticed.
Do bangs make you look younger or older?
It depends on the style and your face shape. Blunt straight-across bangs can create a youthful, doll-like look. Side-swept bangs are timeless and flattering on most face shapes. As bangs grow out and blend into face-framing layers, they tend to soften features and look universally flattering regardless of age.
What haircut helps bangs grow out?
Face-framing layers are the best haircut for growing out bangs. Ask your stylist to cut layers that start at the current length of your bangs, creating a gradual transition. Curtain bangs are also an excellent intermediate style. A shaggy bob or layered cut blends growing bangs seamlessly.
How do you keep growing out bangs out of your face?
Use styling techniques like the blow-dried bend, side twists, Dutch braids, and the half-up bun to keep bangs off your face without pins. Hair accessories like headbands, claw clips, and decorative barrettes also work well. Choose the technique that best matches your current growth stage and hair type.
You Will Get Through This
Growing out bangs tests your patience, but it does not have to test your confidence. With the right styling techniques for each growth stage, a rotation of go-to looks, and a commitment to hair health, you can absolutely learn how to grow out bangs without pinning them back every day.
The awkward stage is temporary. The beautiful, blended, face-framing hair on the other side is worth every frustrating morning. Be patient with yourself, keep your scissors in the drawer, and when in doubt, book a styling appointment with a professional who can guide you through the transition.
You have got this. And when you make it to the other side, you will have a whole new appreciation for your hair and a toolkit of styling skills you never had before.