
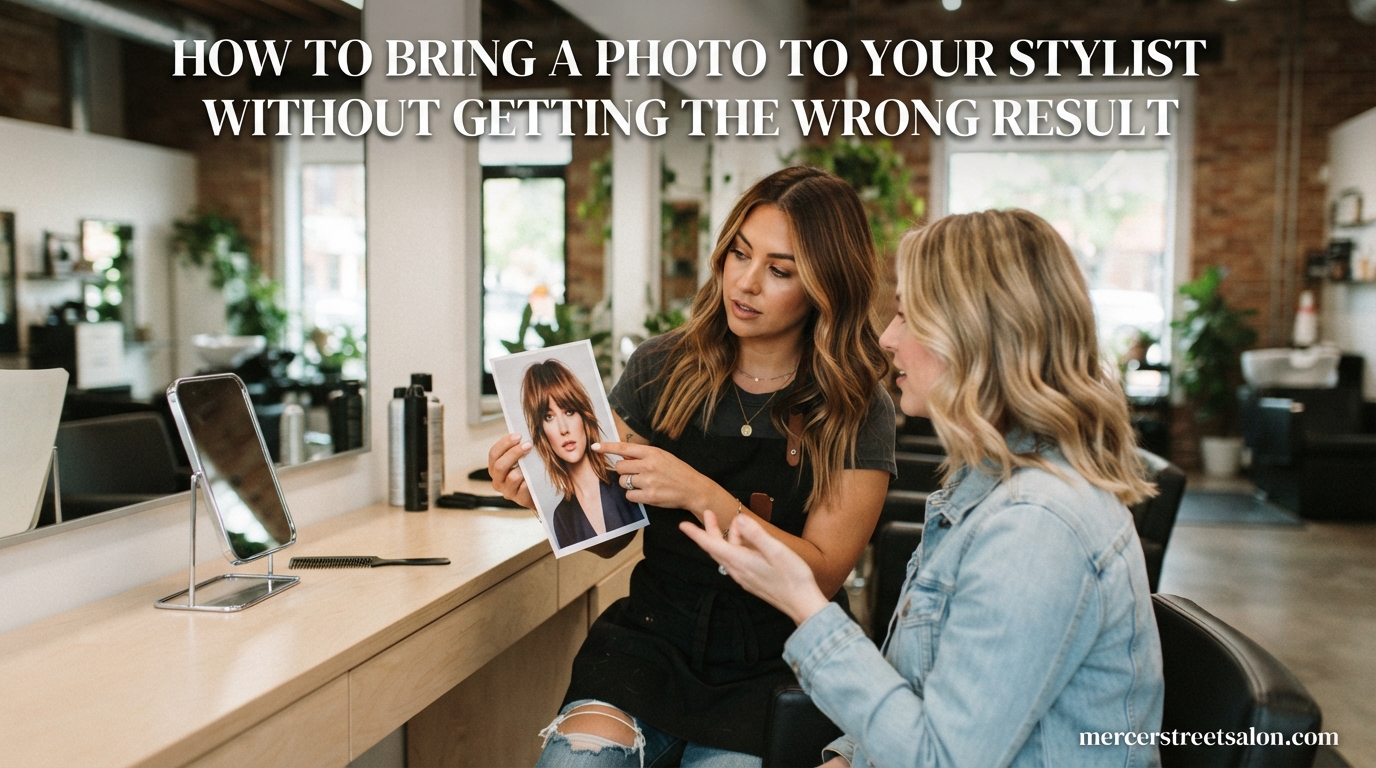
We have all been there. You walk into the salon with a screenshot saved on your phone, you show your stylist the exact look you want, and 90 minutes later you are staring in the mirror at something completely different. Learning how to bring a photo to your stylist without getting the wrong result is not just about picking the right picture. It is about communication, preparation, and understanding what your stylist actually needs from you.
At Mercer Street Salon, we see clients every week who have left other appointments disappointed. They did everything they thought was right. They brought a reference photo. They explained what they wanted. But the result still missed the mark. The frustration is real, especially when you have spent serious money and invested hours in that chair.
Here is the truth most guides will not tell you. The photo is only the starting point. What happens before and during your appointment matters just as much as the picture itself. The way you choose your references, the words you use to describe them, and how you respond to your stylist’s feedback all shape the final result.
This guide breaks down the entire process step by step. You will learn why reference photos fail, how to pick ones that actually work, what to say during your consultation, and what to do if things still go sideways. Whether you are getting a trim, a major color change, or a completely new look, these strategies will help you walk out of the salon with hair you love.
Table of Contents
Why Reference Photos Go Wrong: The Gap Between You and Your Stylist
Reference photos fail for one main reason. You and your stylist are often looking at the same picture but seeing completely different things. This communication gap is the number one cause of disappointing salon results, and it happens far more often than you might think.
One Reddit user captured this frustration perfectly. She had been bringing reference pictures to her hairdresser for three years straight. Every single time, the stylist glanced at the photo for half a second and then just started trimming. The result never matched what she wanted. She tried multiple salons with the same outcome. Stories like this are incredibly common, and they usually stem from the same root causes.
From the client side, you see a photo and you want that exact hair. You focus on the overall vibe, the shape, the way it frames the face. From the stylist side, your hairdresser is mentally translating that image into technique. They are thinking about your hair density, your natural texture, your face shape, and whether your hair can actually hold that style. If those two perspectives never connect, the result will fall short.
Stylists also deal with photos that are not actionable. A heavily filtered Instagram shot, a celebrity with completely different hair type, or an AI-generated image that represents an impossible result. When a stylist sees a photo that will not translate to real life, they sometimes just default to what they know rather than having a difficult conversation about realistic expectations.
This is not about blaming either side. Most stylists genuinely want to give you what you asked for. Most clients genuinely try to communicate clearly. The problem is that neither party has a framework for making reference photos work. That is exactly what this guide provides.
The good news is that once you understand why photos fail, you can fix the problem. The strategies in the following sections address every common failure point, from photo selection to consultation language to mid-appointment feedback. By the end of this guide, you will have a complete system for getting the result you actually want.
How to Choose Reference Photos That Actually Work
Choosing the right reference photo is the single most important step in getting a great salon result. The wrong photo sets you up for failure before your stylist even picks up the scissors. The right photo gives your stylist a clear, actionable target.
Bring Two or Three Photos, Not One
Celebrity hairstylist Michael Douglas, whose clients include Kate Moss and Claudia Schiffer, recommends bringing two or three reference photos rather than just one. Each photo should feature a different person. This strategy works because it helps your stylist understand which specific elements you are drawn to, rather than asking them to replicate one entire look that may not suit you.
For example, you might bring one photo for the cut shape you want, another for the color tone, and a third showing how you want the hair to fall around your face. Your stylist can then merge those elements into a personalized result that works with your actual hair. This approach is far more effective than handing over a single celebrity photo and hoping for a carbon copy.
Match Hair Type and Texture
This is the mistake that ruins more reference photos than any other. If you have fine, straight hair and you bring a photo of someone with thick, curly hair, your stylist cannot make your hair do that. It is physically impossible. Yet clients do this constantly, and then feel disappointed when the result looks nothing like the photo.
When choosing reference photos, look for people whose natural hair type is similar to yours. If you have type 2B wavy hair, find photos of people with similar wave patterns. If you have coarse, dense hair, look for references with similar texture. This does not mean you cannot be inspired by different hair types, but your primary reference photos should reflect hair that is realistically close to yours.
Pay attention to hair density too. Someone with thin, fine hair showing a reference of thick, voluminous layers will not get the same result. The layers will fall flat. Talk to your stylist about your hair density and ask them to help you find references that will actually translate.
Look for Natural Lighting and Clear Angles
Photos taken in good natural lighting show your stylist the true color, texture, and movement of the hair. Photos taken in dim salon lighting, harsh flash, or heavy filters distort everything. Your stylist cannot accurately assess color tone or cut detail from a dark, grainy, or over-edited image.
Look for photos shot from multiple angles if possible. A front view shows face-framing and overall shape. A side view reveals layering and length. A back view shows the cut structure and color dimension. If you can only find front-facing photos, that is fine, but multiple angles give your stylist much more to work with.
Avoid Heavily Filtered or Edited Photos
Instagram filters change hair color dramatically. What looks like a warm honey blonde on your screen might actually be a cool beige blonde in real life. Heavily edited photos create a false target that no stylist can hit, because the photo itself does not represent reality.
Stick to photos that look natural and unedited. If you love a particular post but suspect it has been filtered, tell your stylist that. Say something like, “I love the overall tone of this but I know it might be filtered. Can we talk about what the real color probably looks like?” This shows self-awareness and invites your stylist to give honest feedback.
Include a Deal-Breaker Photo
Sometimes knowing what you do not want is just as helpful as knowing what you do want. Bring a photo of a style you absolutely hate and tell your stylist why. Maybe you cannot stand blunt ends, or you despise face-framing layers that flick outward. This negative reference gives your stylist clear boundaries to work within.
Combined with your positive references, a deal-breaker photo narrows the options dramatically. Your stylist knows what to aim for and what to avoid, which significantly reduces the chance of a disappointing result.
How to Take Your Own Reference Photos
Sometimes the best reference photo is one you take yourself. Your own photos show your actual hair type, your real face shape, and how your hair behaves day to day. Taking good reference photos of yourself is a skill, and it is one that will serve you at every future salon appointment.
Step 1: Use Natural Daylight
Stand near a window or step outside during the day. Natural daylight shows your true hair color and texture without distortion. Avoid bathroom lighting, overhead fluorescents, or your phone flash. All of these alter how your hair looks and give your stylist inaccurate information.
The best time to take reference photos is mid-morning or late afternoon when the light is soft and even. Direct noon sunlight can create harsh shadows. Cloudy days actually work beautifully because the light is diffused and even across your hair.
Step 2: Capture Multiple Angles
Take at least four photos. One from the front, one from each side, and one from the back. If you can get someone to help you with the back shot, even better. These four angles give your stylist a complete picture of your current hair, which they need in order to plan the transformation.
For each angle, look straight ahead and keep your expression neutral. Pull your hair back slightly from your face so the stylist can see your face shape. If you are showing your current style, let your hair fall naturally the way you typically wear it.
Step 3: Show Your Hair in Its Natural State
Do not straighten curly hair or curl straight hair before taking reference photos. Your stylist needs to see your natural texture to understand what they are working with. If you normally style your hair a certain way, take one set of photos natural and one set styled. This gives your stylist the full picture.
Wash your hair the day before, not the day of the photos. Freshly washed hair can behave differently than day-old hair, and you want your photos to reflect how your hair looks on a typical day. Avoid using heavy products that might change your hair’s natural appearance.
Step 4: Take a Before and After Set
If you are planning a significant change, take detailed before photos right before your appointment. Then take after photos once your hair is done. Over time, this builds a personal portfolio that shows what works and what does not. You can reference these photos at future appointments to show your stylist exact looks you have loved or hated.
Step 5: Use Your Phone’s Back Camera, Not the Front Camera
This connects to a question many people ask: why do I look bad in the front camera but good in the mirror? The answer is that front-facing cameras use a wide-angle lens that distorts your features and flips your image. The back camera on your phone gives a more accurate representation. Even better, ask a friend to take the photo from a normal distance, which produces the most realistic result.
If you must use the front camera, hold your phone at arm’s length or slightly beyond. Avoid holding it too close, which creates that distorted fish-eye effect that makes your nose look bigger and your face shape wider than it actually is.
How to Prepare Before Your Appointment
Preparation is where most salon visits are won or lost. The work you do before you sit in the chair determines whether your reference photos lead to the right result. Here is how to set yourself up for success before your appointment even begins.
Book a Consultation First
This is the single most important thing you can do. A consultation is a short appointment where you and your stylist discuss what you want before any cutting or coloring happens. Many salons offer these for free or for a small fee that goes toward your service. If your salon does not offer consultations, find one that does.
One Reddit user discovered that switching to a salon with pre-appointment consultations completely solved her reference photo problem. After years of stylists ignoring her photos, she finally found a stylist who sat down with her for fifteen minutes before the appointment, looked at each photo carefully, and discussed what was realistic. The result was exactly what she wanted.
During a consultation, your stylist should examine your hair texture, density, face shape, and current condition. They should look at your reference photos and tell you honestly what will work and what will not. If your stylist does not offer this kind of feedback, that is a red flag.
Organize Your Photos Before You Arrive
Do not scroll through your camera roll during your appointment trying to find the right photo. Have your reference photos saved in a dedicated album or folder on your phone. Label them if you can. Know which photo shows the cut you want, which shows the color, and which shows the styling.
Pinterest boards work well for this. Create a board called “Hair Inspiration” and save your top three to five photos there. Add a note under each one explaining what specifically you like about it. When you arrive at the salon, you can hand over your phone with everything already organized and ready to go.
Know Your Hair History
Your stylist needs to know what has been done to your hair previously. If you have box dye from six months ago, keratin treatments, recent bleaching, or any chemical processes, tell them. This information affects what they can safely do with your hair and prevents disasters like color that turns green or hair that breaks off.
Write it down if you need to. A simple list of products, treatments, and dates will save your stylist time and prevent costly mistakes. If you do not know your hair history because it has been a while, be honest about that too. Your stylist would rather know than guess.
Arrive With Clean, Dry Hair
Unless your stylist tells you otherwise, arrive with your hair clean and dry, styled the way you normally wear it. This lets your stylist see your hair in its natural, everyday state. Wet hair looks completely different from dry hair, and your stylist needs to assess your hair as it actually looks on a normal day.
Avoid piling your hair into a bun or clip right before your appointment. This can create kinks and distort your natural texture. Let it hang loose so your stylist can see the true shape and movement.
What to Say During Your Consultation
The consultation is your window of opportunity. This is where you translate your reference photos into clear instructions your stylist can act on. The exact words you use matter more than you might think, and knowing the right terminology makes a huge difference.
Start With the Big Picture
Open the conversation with a summary of what you want. Say something like, “I am looking for a change. I want to go shorter and add some warmth to my color. I brought a few photos to show you what I am thinking.” This gives your stylist a framework before they start looking at specifics.
Then walk through each photo one at a time. For each one, explain exactly what you like about it. Do not just say, “I want this.” Say, “I love the length in this photo, and the way the layers frame the face. I do not want the color though.” Being specific about what you like and dislike helps your stylist understand your vision.
Use the Right Terminology
Knowing a few key terms helps you communicate more precisely. Here are some that stylists use and understand clearly.
Layers: Hair is cut at different lengths to create movement and volume. Long layers are subtle. Short layers create more texture and lift.
Face-framing: Shorter pieces around the face that gradually get longer toward the back. These soften your features and draw attention to your face.
Blunt cut: All the hair is cut to one length with no layers. This creates a clean, sharp line and works well for fine hair.
Curtain bangs: Bangs that are longer on the sides and shorter in the middle, framing the face like curtains. They are versatile and grow out easily.
Balayage: A freehand highlighting technique where color is painted on for a natural, sun-kissed effect. Unlike traditional highlights, there is no harsh regrowth line.
Lived-in color: Color that looks natural and grows out gracefully. Low-maintenance and designed to look good for months.
Ask the Right Questions
After showing your photos, ask questions that invite honest feedback. Here are some that work well.
“Do you think this style will work with my hair type?” This gives your stylist permission to be honest about what is realistic.
“What would you change about this look to make it work for me?” This shows you trust their expertise and are open to adjustments.
“How much maintenance will this style require?” This prevents surprises later when you cannot recreate the look at home.
“How will this color fade over time?” Color always changes as it fades. Knowing what to expect helps you decide if you are ready for the upkeep.
Listen to Your Stylist’s Feedback
If your stylist tells you a reference photo will not work with your hair type, listen. They are not being difficult. They are saving you from a disappointing result. Ask them to explain why and request alternative suggestions.
A good stylist will offer alternatives rather than just saying no. They might say, “That cut will not hold its shape with your fine hair, but I can give you something similar with face-framing layers that will give you the same vibe.” This kind of feedback shows they understand what you want and are working with you to achieve it.
If your stylist does not engage with your photos or offer feedback, that is a warning sign. A stylist who truly cares will discuss your references thoroughly before picking up their tools.
7 Common Mistakes to Avoid When Bringing Reference Photos
Even with great photos, certain mistakes can derail your salon visit. Here are seven to watch out for, based on real experiences from clients and stylists.
Mistake 1: Bringing Only Celebrity Photos
Celebrity photos are everywhere and they are tempting. But celebrities have teams of stylists, professional lighting, extensions, and genetics that may be very different from yours. A photo of Margot Robbie’s blonde will not look the same on someone with different natural coloring and hair density.
You can absolutely use celebrity photos as inspiration. Just be prepared for your stylist to adapt the look to suit you. Bring the celebrity photo alongside photos of non-celebrities with similar hair for a more realistic reference.
Mistake 2: Bringing a Single Photo
One photo gives your stylist very little to work with. It asks them to replicate an entire look rather than understand what you like about it. As mentioned earlier, two or three photos from different angles or featuring different elements are far more effective.
Mistake 3: Not Explaining What You Like About the Photo
Handing over your phone and saying nothing is a recipe for miscommunication. Your stylist cannot read your mind. They might focus on the color when you were actually showing them the cut. Always explain what specifically you like about each reference photo.
Mistake 4: Bringing AI-Generated Photos
This is an emerging problem that stylists on Reddit are increasingly frustrated by. Clients are bringing in AI-generated hair photos that look stunning but are physically impossible to recreate. AI images can show hair that defies gravity, colors that cannot exist in real life, and textures that are completely fabricated.
If you have an AI-generated image that captures a vibe you love, that is fine. Just be upfront about it. Tell your stylist, “I know this is AI-generated, but I love the overall feel. Can we adapt elements of this for real hair?” Honest communication prevents your stylist from feeling set up to fail.
Mistake 5: Expecting an Exact Replica
No stylist can give you an exact copy of someone else’s hair. Your hair has its own texture, density, growth patterns, and natural movement. The goal is to capture the essence of the reference, not to clone it pixel for pixel. Go in with realistic expectations and you will be much happier with the result.
Mistake 6: Not Speaking Up During the Appointment
If your stylist is cutting or coloring and you can already see it is going in the wrong direction, say something. Politely. Immediately. Do not wait until the appointment is over and then cry in your car. A simple, “I was hoping for a bit more length there” or “That color looks darker than I expected, can we talk about it?” can redirect the appointment before it is too late.
Many clients feel rude speaking up, but a good stylist would much rather you say something during the appointment than leave unhappy. Speak up kindly and clearly. Your stylist wants you to love the result.
Mistake 7: Choosing a Stylist Who Does Not Listen
If you have been to the same stylist multiple times and they consistently ignore your reference photos, it is time to find someone new. The Reddit user who brought photos for three years without success kept going back to the same type of salon. Once she switched to a salon that prioritized consultations, her experience completely changed.
Your stylist should make you feel heard. They should look at your photos carefully, discuss them with you, and explain their plan. If that is not happening, you are in the wrong chair.
What to Do If You Still Get the Wrong Result
Sometimes, despite your best efforts, the result is still wrong. It happens. Maybe the color came out darker than expected, the layers are shorter than you wanted, or the overall shape just does not work for you. Here is exactly what to do next.
Speak Up Before You Leave the Salon
This is the most important step. Do not leave the salon, go home, and then post on Facebook that you are disappointed. If something is wrong, say so before you pay and walk out. Most salons want to fix problems immediately and will adjust the cut or color right then at no extra charge.
Be specific and kind. Say, “I love the color overall, but it is a bit darker than I was expecting. Is there a way we can lighten it slightly?” Or, “The layers are shorter than I pictured. Can we adjust the top layers so they blend better?” A good salon will respond with solutions, not attitude.
Call Within 48 Hours If You Notice Issues Later
Sometimes you do not realize something is wrong until you wash and style your hair at home. That is normal. Salons typically have a window of 48 to 72 hours during which they will fix issues for free. Call as soon as you notice the problem and explain what is bothering you.
Say, “I washed my hair this morning and the color looks different than it did in the salon. I think it might need a toner adjustment. Can I come in this week?” Salons are used to these calls and would rather fix the issue than have you walk around unhappy.
Document the Problem
Take clear photos of your hair in natural light showing the issue. This is helpful for two reasons. First, it gives the salon a clear picture of what needs fixing. Second, if you decide not to return to that salon, you have documentation to show your next stylist exactly what went wrong so they can correct it.
Know When to Move On
If your stylist dismisses your concerns, gets defensive, or refuses to make adjustments, it is time to find a new salon. One Facebook user shared that she paid $250 for a result that was nothing like her reference photo and left deeply disappointed. That experience is unfortunately common, but you do not have to repeat it.
Look for a salon that advertises consultations, has strong reviews mentioning communication, and employs stylists who showcase a range of work on their social media. A salon that takes pride in listening to clients will make that obvious in their online presence.
Be Honest With Your Next Stylist
When you book with a new stylist, tell them about your past experience. You do not need to name the previous salon. Just explain what went wrong and what you are looking for this time. A great stylist will appreciate the context and work extra hard to rebuild your trust.
Quick Pre-Appointment Checklist
Use this checklist before every salon appointment to make sure you are set up for success. Save it to your phone or screenshot it so you have it handy.
1. Choose 2 to 3 reference photos featuring people with hair type similar to yours. Make sure each photo is well-lit and shows the hair clearly.
2. Note what you like about each photo. Write it down or save a note on your phone so you remember during the consultation.
3. Bring a deal-breaker photo showing a style you absolutely do not want.
4. Organize photos in a dedicated folder or Pinterest board. Do not scroll through your camera roll during the appointment.
5. Book a consultation before the appointment if your salon offers one. If not, ask for a few minutes of discussion before the service begins.
6. Know your hair history. List any recent color, treatments, or chemical processes.
7. Arrive with clean, dry hair styled the way you normally wear it.
8. Prepare questions to ask your stylist about maintenance, realistic outcomes, and any concerns.
9. Plan to speak up during the appointment if anything looks off. Politely and immediately.
10. Take before and after photos for your own records and future reference.
FAQs
Can I show my hairdresser a picture?
Yes, absolutely. Most hairdressers love when clients bring reference photos because it gives them a clear visual target. The key is bringing 2 to 3 photos featuring people with similar hair type, explaining what you like about each one, and being open to your stylist’s feedback about what is realistic for your hair.
What to do when your stylist messed up?
Speak up before you leave the salon. Most salons will fix issues on the spot at no extra charge. If you notice the problem after going home, call within 48 hours while the salon’s adjustment window is still open. Take clear photos of the issue in natural light, and if the salon refuses to help, find a new stylist and show them what went wrong so they can correct it.
Why do I look bad in front camera but good in mirror?
Your front-facing phone camera uses a wide-angle lens that distorts your features and flips the image, making your face look wider and your nose look bigger. The mirror shows a more accurate reflection. For reference photos, use your phone’s back camera held at arm’s length, or ask a friend to take the photo from a normal distance for the most realistic result.
How to edit pics to make them look professional?
For reference photos, less editing is better. Use natural daylight, shoot from multiple angles, and avoid filters that change hair color. If you want to clean up a photo, use basic adjustments like brightness and contrast, but never use filters that alter the hair’s color or texture. Your stylist needs to see the true color and shape.
Do hairdressers like when you bring in pictures?
Yes, the vast majority of stylists appreciate reference photos. Photos give them a concrete starting point rather than vague descriptions. What stylists do not love is when clients bring heavily filtered images, AI-generated photos, or celebrity references with completely different hair types and expect an exact replica. Bring realistic photos and explain what you like, and your stylist will welcome them.
Is it rude to show hairdressers photos or videos of hair?
Not at all. Showing photos is one of the best ways to communicate what you want. What can feel rude is handing over your phone without explaining what you like, or insisting on an exact copy of a photo that will not work with your hair type. Show your photos, explain your preferences, and listen to your stylist’s professional input.
Walk Out of the Salon Happy Every Time
Getting the hair you want comes down to clear communication and the right preparation. When you know how to bring a photo to your stylist without getting the wrong result, every salon appointment becomes an opportunity rather than a gamble.
Choose reference photos that match your hair type. Bring two or three, not just one. Explain what you like about each photo using clear language. Book a consultation if you can. Speak up during the appointment if something looks off. And if things do go wrong, address it immediately and kindly before you leave.
Your stylist wants you to leave happy. Give them the right photos, the right information, and the right feedback, and they will have everything they need to make that happen. The next time you sit down in the salon chair, you will be ready.