
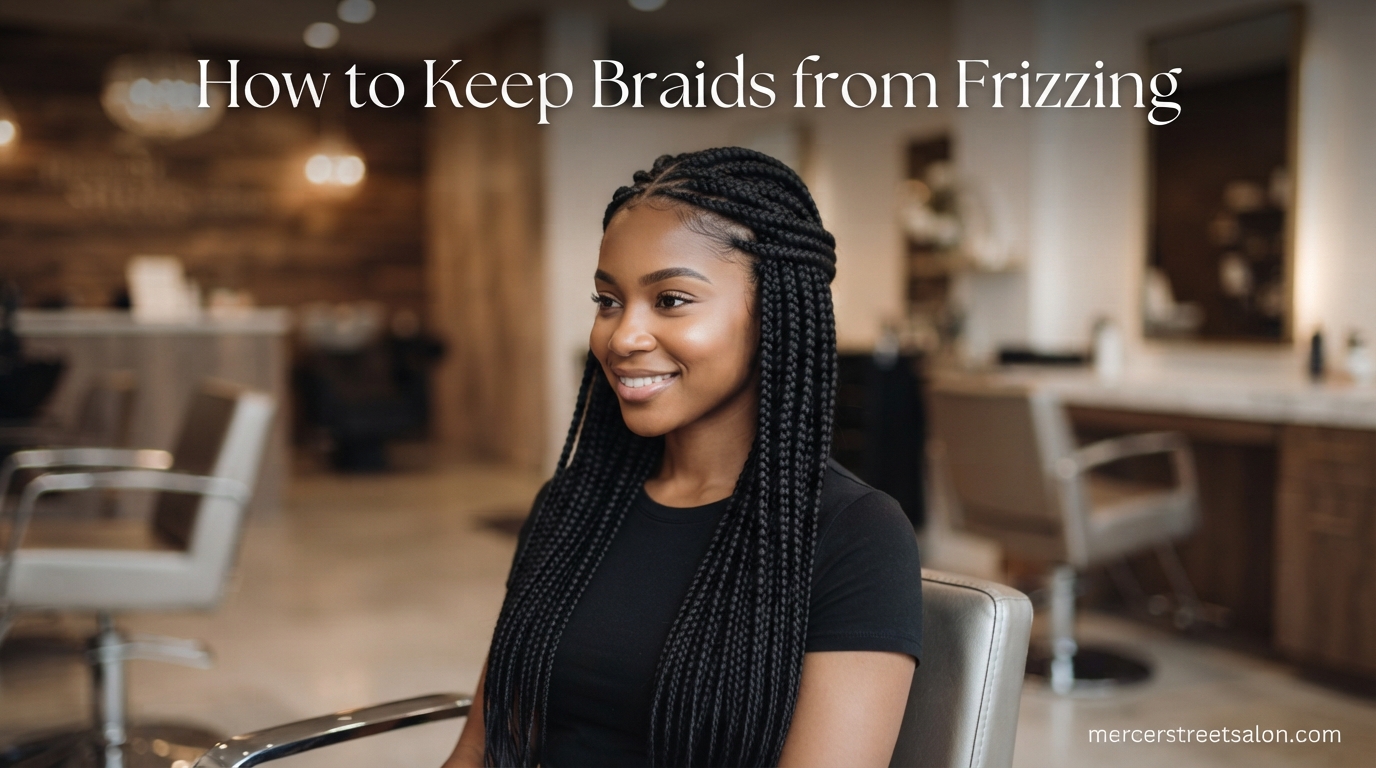
Day one of fresh braids or twists feels amazing. Your style is neat, your edges are laid, and everything looks polished. But by night three or four, you start noticing that familiar halo of frizz creeping in around your roots and along the length of your braids. If you are wondering how to keep braids and twists from frizzing after a few nights, you are not alone. This is one of the most common frustrations our clients at Mercer Street Salon bring to us, and the good news is that frizz is almost entirely preventable with the right routine.
The secret comes down to three things: reducing friction while you sleep, locking in the right amount of moisture, and knowing how to refresh your style when it starts to look worn. Most people get the first part right (silk or satin protection) but miss the other two pieces. We have spent years perfecting nighttime routines for clients with box braids, two-strand twists, passion twists, mini twists, cornrows, and every other protective style you can think of. What follows is everything we have learned, distilled into a guide you can use tonight.
Here is the short answer to how to keep braids and twists from frizzing after a few nights: wrap your braids in a silk or satin scarf or bonnet every night, sleep on a silk pillowcase as a backup, moisturize lightly every two to three days with a lightweight oil or leave-in spray, and avoid cotton pillowcases entirely. Do those four things consistently and your braids will look fresh for weeks instead of days. Below, we break down exactly how to do each step, plus everything else you need to know about protecting your style.
One thing we want to stress from the start is that protective styles are not maintenance-free styles. We see this misconception all the time in our salon. People install braids expecting a vacation from hair care, then are surprised when frizz appears by the end of week one. The reality is that braids and twists need a nightly routine just like loose hair does. The good news is that the routine takes less than five minutes once you get the hang of it, and it can double or even triple the lifespan of your style.
Table of Contents
Why Braids and Twists Frizz Overnight
Braids and twists frizz overnight because of three main factors: friction, moisture loss, and humidity. Understanding how each one works is the foundation for preventing frizz before it starts. Once you know what is causing the problem, the solutions make a lot more sense.
Friction Is the Number One Culprit
Every time your head moves against a cotton pillowcase, tiny fibers grab at your braids and lift the hair cuticle. The cuticle is the outermost layer of each hair strand, made up of overlapping scales that lie flat when hair is healthy and smooth. When those scales lift, hair looks rough, dull, and frizzy instead of sleek. Cotton is particularly bad because it has a rough, absorbent texture that creates maximum friction against braided hair. This is why someone can sleep on braids for one night on a cotton pillowcase and wake up with visible frizz, while the same person on a silk pillowcase can go a full week without any.
The friction problem gets worse the longer your braids are. Longer braids have more surface area rubbing against fabric, which means more cuticle lifting and more frizz. The same applies to looser twist styles like passion twists, where the hair is not braided tightly and individual strands are more exposed to friction. If your bonnet slips off at night (a complaint we hear constantly from clients), your braids are getting the full friction treatment for hours without you knowing.
Think of it this way: every time you toss and turn, your braids are being dragged across a surface. On cotton, that surface acts like very fine sandpaper against the hair cuticle. On silk or satin, the surface is so smooth that the hair slides without catching. This single difference is responsible for more overnight frizz than every other factor combined.
Moisture Loss Dries Out the Cuticle
Braided hair loses moisture faster than loose hair because the natural oils from your scalp cannot travel down the length of each braid as easily. When hair becomes dry, the cuticle lifts outward as the hair shaft shrinks and contracts. This is the same reason a raw piece of wood splinters when it dries out. Dry braids look fuzzy and feel rough instead of smooth and defined.
Central heating and air conditioning make this worse by pulling humidity out of the air in your bedroom. If you live in a dry climate or run your HVAC system overnight, your braids are losing moisture for eight hours straight. This is why some people find their braids frizz more in winter than summer, even though summer humidity gets blamed more often. The frizz you blame on humidity in summer is often actually caused by your air conditioner drying out the air overnight.
This is also why braids tend to frizz at the ends first. The ends are the furthest point from your scalp’s natural oil supply, so they dry out fastest. When you moisturize, the ends should always get extra attention because they need it the most.
Humidity Swings Cause Cuticle Confusion
Humidity is the opposite problem but produces the same result. When the air is very humid, dry hair absorbs water from the atmosphere and the cuticle swells and lifts. This is why braids that look great in the morning can frizz up the moment you step outside on a humid day. Overnight humidity in your bedroom works the same way, especially in summer months or if you live in a humid climate.
The tricky part is that hair needs some moisture to stay smooth, but too much causes frizz. The goal is not to eliminate all moisture from the air but to keep humidity in a moderate range. We will get to exactly how to do this in the section on sleeping environment.
The combination of all three factors is why frizz tends to appear after a few nights rather than immediately. One night of friction causes minor cuticle lifting. Two or three nights compound the damage. Add in some moisture loss or a humidity spike, and by night four or five, your braids have that fuzzy, worn look that sends people searching for solutions.
How to Keep Braids and Twists from Frizzing After a Few Nights: The Nighttime Routine
The nighttime routine is where most of the frizz prevention happens. If you only change one thing after reading this article, make it your overnight protection method. Here is how to keep braids and twists from frizzing after a few nights using a combination of barriers, wrapping techniques, and smart habits.
Step 1: Choose Your Overnight Barrier
You have four main options for overnight protection: a silk pillowcase, a satin bonnet, a silk scarf, or a durag. Each has advantages and drawbacks, and many people use two of them together for maximum protection. We cover the full comparison later in this article, but here is the quick version.
A silk pillowcase is the best baseline protection because it covers your entire sleeping surface. Even if your bonnet or scarf slips off, your braids are still resting on a smooth, low-friction material. Look for mulberry silk with a weight of at least 19 momme (22 momme is ideal) for durability and smoothness. Satin pillowcases are a more affordable alternative but are typically made from polyester, which does not breathe as well and is slightly rougher than true silk.
The difference between silk and satin is worth understanding because people use the terms interchangeably but they are not the same thing. Silk is a natural protein fiber produced by silkworms, and it has a smooth, hydrophobic surface that repels moisture and reduces friction. Satin is a weave pattern, not a material, and most satin products are made from polyester. Polyester satin is much smoother than cotton but not as smooth as real silk. If budget allows, go for silk. If not, polyester satin is still a massive improvement over cotton.
A satin bonnet is the most popular choice for braids because it covers the entire head and stays in place better than a scarf for most people. Look for a bonnet with a wide, flat elastic band rather than a thin string, because thin bands slip off easily and leave hair unprotected. Some bonnets come with an adjustable drawstring, which is a great feature if you have a lot of thick braids or if standard sizes tend to slip off your head.
Step 2: Wrap Your Braids Before Bed
Before you put on your bonnet or tie your scarf, you need to gather and secure your braids. Leaving them loose means they will rub against each other and against your sleeping surface all night. Here is the step-by-step method we recommend.
Step 1: Gather your braids into a loose, high ponytail at the crown of your head using a silk scrunchie. Do not use a regular rubber band or elastic, because those will create a dent and cause breakage at the gathering point. A silk scrunchie slides smoothly and holds without tension.
Step 2: If your braids are long, loop the ponytail once or twice and secure it with a second silk scrunchie to create a loose bun. This is the pineapple method, and it keeps long braids contained so they do not drag across your pillow. For shorter braids, you can skip this step.
Step 3: Place your satin bonnet over your entire head, making sure all braids are tucked inside. Adjust the band so it sits comfortably around your hairline without being too tight. If you are using a silk scarf instead, fold it into a triangle, place the long edge along your hairline, and tie the two ends at the back or top of your head. Make sure the scarf covers all your braids, including the ends.
Step 4: For extra hold, layer a durag over the scarf or bonnet. This is especially useful for keeping edges smooth and preventing the scarf from slipping. A durag also provides compression that helps keep braids flat against your head, which reduces friction further.
Step 5: In the morning, remove the bonnet or scarf carefully rather than yanking it off. Pulling it off quickly can create the same friction you spent all night trying to avoid. Gently lift the edge and slide it off, then shake your braids loose with your fingers.
Step 3: The Silk Scarf Wrapping Technique in Detail
The silk scarf wrapping technique deserves its own walkthrough because it is the method our salon clients have the most trouble with. A poorly wrapped scarf is almost as bad as no scarf at all, so it is worth getting this right.
Start with a large silk scarf, at least 35 by 35 inches, so you have enough fabric to cover your entire head with room to tie. Fold the scarf diagonally to create a triangle. Place the long folded edge along your forehead, just above your eyebrows, with the point of the triangle hanging down the back of your head.
Take the two side corners and pull them to the back of your head, crossing them over each other at the nape of your neck. Then bring them back up to the front and tie them at the top of your head. Tuck the back point of the triangle up under the tied section. Finally, smooth down any loose sections and make sure every braid is covered, paying special attention to the hairline and the ends.
If your scarf still slips during the night, try adding a bobby pin or two at the sides. Some people also find that wrapping the scarf slightly higher on the forehead (rather than right at the hairline) gives a better grip. It may take a few tries to find the technique that works for your head shape and braid length, so do not give up after one attempt.
Step 4: Set Up Your Sleeping Environment
Your sleeping environment matters more than most people realize. If your bedroom is very dry from heating or air conditioning, your braids are losing moisture overnight even with a silk barrier. Consider running a humidifier in your bedroom during dry months to maintain around 40 to 50 percent relative humidity. In humid climates, a dehumidifier set to keep humidity below 60 percent will prevent excess moisture absorption.
You can buy a cheap hygrometer (a device that measures humidity) for under $15 to find out what the humidity level in your bedroom actually is. This takes the guesswork out of the process and tells you whether you need a humidifier or a dehumidifier. Many people are surprised to find that their bedroom humidity swings dramatically depending on the season.
Also, pay attention to your sleepwear. Sweating at night introduces salt and moisture to your braids and scalp, which can cause frizz and itchiness. Breathable sleepwear, ideally silk or cotton, helps regulate your temperature and reduces sweating. This is a small detail that makes a bigger difference than you might expect. If you regularly wake up sweaty, your sleepwear or room temperature is the first thing to address.
Finally, consider your sleeping position. Side and stomach sleepers put more pressure on one side of their braids, which can cause asymmetric frizz. If you can train yourself to sleep on your back, even some of the time, it will reduce the pressure on your braids and distribute friction more evenly.
Pre-Bed Preparation: Setting Your Braids Up for Success
What you do in the hour before bed has a big impact on how your braids look in the morning. A good pre-bed routine takes less than ten minutes and pays off in days of extra wear from your style. Here is what to do each night.
Lightly Mist or Oil Your Braids
If your braids feel dry, lightly mist them with a water-based leave-in spray or braid refresher. You do not need to soak them. A light mist from a spray bottle is enough to rehydrate the hair cuticle without causing buildup. Follow with a few drops of lightweight oil (jojoba, argan, or grapeseed) smoothed between your palms and gently pressed over the surface of your braids. This seals in the moisture from the spray.
The technique matters here. Do not rake your fingers through your braids when applying oil, because this can pull fibers loose and create more frizz. Instead, press your palms gently against the braids and smooth downward. Think of it as glazing the surface rather than working product into the hair. This is the method our stylists use in the salon, and it makes a visible difference.
Avoid heavy creams, butters, and thick oils at night. These sit on the surface of the hair and attract lint and dust while you sleep. They also take a long time to absorb, leaving your braids feeling greasy in the morning. Save heavier products for daytime use when your hair can absorb them throughout the day.
Smooth Down Flyaways with Edge Control
For the hairline and any areas prone to frizz (especially the crown and the base of the neck), a small amount of edge control gel or styling cream can help. Apply a pea-sized amount to a soft-bristle toothbrush or edge brush and smooth it along your hairline. Wrap your braids immediately afterward so the edge control sets overnight.
This is a technique we see work well for clients with 4c hair and high-density textures, where flyaways are more visible. For finer hair textures, use a very small amount of product, because too much edge control can look greasy and weigh down delicate strands. The key is less product, more precision.
If you do not want to use edge control every night, you can do this step every other night or only on the areas that tend to frizz most. The hairline, the crown, and the nape of the neck are the three areas that frizz first for almost everyone, so focus your attention there.
Refresh Your Scalp
If your scalp feels itchy or you notice any buildup, take a moment to address it before bed. A few spritzes of a scalp refresher spray (water with a few drops of tea tree or peppermint oil) can soothe itchiness and keep your scalp healthy. For more significant buildup, use a cotton swab dipped in witch hazel along your parts to gently cleanse the scalp without wetting your braids.
A clean scalp is directly tied to style freshness. Oil, sweat, and product buildup on your scalp can migrate onto your braids and make them look dull and frizzy faster. This is one of the most overlooked parts of braid maintenance, and it only takes a minute. Clients who add scalp cleansing to their nightly routine consistently report that their braids look fresh for longer.
Pay attention to signs that your scalp needs more than a quick refresh. If you notice persistent itching, redness, bumps, or a smell coming from your scalp, you may need a full wash. Do not ignore these signs, because scalp health directly affects the health of the hair underneath your braids.
Moisturizing Without Causing Buildup
Moisture is essential for preventing frizz, but too much of the wrong product causes more problems than it solves. Product buildup attracts dust and lint, causes white flakes, makes braids look dull, and can even lead to scalp issues like folliculitis. The key is moisturizing with the right products, in the right amounts, at the right frequency.
How Often Should You Moisturize Braids?
For most hair types, moisturizing braids every two to three days is the sweet spot. This is frequent enough to keep the cuticle smooth but not so frequent that product accumulates. In dry climates or during winter, you may need to moisturize every other day. In humid climates, once every three to four days is usually enough because the air is providing moisture naturally.
The best test is how your braids feel. If they feel rough and dry when you run your hand down them, it is time to moisturize. If they feel slick or you can see product residue, skip a day or two. Learning to read your hair takes a little practice but pays off in longer-lasting styles.
One common mistake is moisturizing on a fixed schedule regardless of how your hair feels. Hair needs change with the weather, your activity level, and how long you have had your braids in. Let the condition of your braids guide you rather than the calendar.
The Best Products for Moisturizing Braids
Lightweight oils are the best daily moisturizers for braids and twists. Jojoba oil is our top recommendation because it closely matches the natural sebum produced by your scalp, meaning it absorbs well without sitting on the surface. Argan oil and grapeseed oil are also excellent choices. Apply three to five drops between your palms, then gently smooth over the length of your braids, focusing on the ends where hair is driest.
Leave-in conditioner sprays are the second option. These combine water with lightweight conditioning agents and are ideal for a quick moisture boost. Look for formulas that are alcohol-free and silicone-free, because alcohol dries out the hair and silicone can build up over time. A good leave-in spray can be used daily in very small amounts.
Avoid heavy products like shea butter, cocoa butter, and thick styling creams for overnight braid maintenance. These are great for initial styling or for loose natural hair, but on braids they sit on the surface, attract debris, and are difficult to remove without a full wash. If you must use a cream, apply it sparingly during the day when your hair can absorb it.
The LOC Method for Braids: Adapted
You may have heard of the LOC method (liquid, oil, cream) for natural hair. For braids, we recommend a simplified version: mist lightly with water or a leave-in spray, then seal with a lightweight oil. Skip the cream step unless your hair is extremely dry. This two-step approach provides enough moisture for most braid types without the buildup risk.
For high-porosity hair that loses moisture quickly, you can add the cream step back in, but use only a small amount of a lightweight cream rather than a heavy butter. Apply it between the liquid and oil steps so it gets sealed in rather than sitting on top.
How to Layer Products Correctly
Product layering is something forum users ask about constantly, and it makes a real difference in how well your moisturizing routine works. The rule is simple: always apply products from lightest to heaviest. Start with water or a water-based spray, then apply a lightweight oil, then (if needed) a heavier product. This allows each layer to absorb properly instead of being blocked by a heavier product underneath.
If you apply oil first and then try to mist with water, the oil will repel the water and it will not reach the hair. If you apply a heavy cream and then try to seal with oil, the oil will not penetrate through the cream. Getting the order right takes five seconds of thought and makes every product work better.
Overnight Protection Methods Compared
Choosing the right overnight protection can be confusing because there are so many options. Here is how the four main methods compare so you can pick what works best for your hair type, sleep habits, and braid style.
Silk Pillowcase: The best all-around baseline protection. Covers your entire sleeping surface, so even if your bonnet or scarf slips off, your braids are still on a smooth surface. True silk (mulberry silk, 19 momme or higher) is smoother and more durable than satin. The downside is that a silk pillowcase alone does not contain your braids, so they can still rub against each other. Cost is higher than other options, but a quality silk pillowcase lasts for years.
Satin Bonnet: The most popular choice because it covers the entire head and keeps all braids contained. A wide, flat elastic band or adjustable drawstring is essential for keeping it in place. Bonnets are affordable, easy to use, and come in large sizes that accommodate thick, long braids. The downside is that bonnets slip off during the night for some sleepers, especially side and stomach sleepers. Look for bonnets with a double-layer design for extra durability.
Silk Scarf: Provides the most customizable fit because you can tie it as tight or loose as you need. A scarf also doubles as a daytime wrap if you want to protect your style while running errands. The downside is that tying a scarf correctly takes practice, and a poorly tied scarf will slip off or leave sections of hair exposed. This is the most versatile option once you master the technique.
Durag: Excellent for keeping edges smooth and providing compression that holds braids flat against the head. Often worn as a second layer over a bonnet or scarf for maximum protection. The compression also helps with wave training for short hair under braids. The downside is that a durag alone may not cover very long braids, and some people find the ties uncomfortable for sleeping.
Our recommendation for most people: use a silk pillowcase as your base layer, then add a satin bonnet or silk scarf on top. If you are a restless sleeper or your bonnet tends to slip off, add a durag for extra hold. This layered approach gives you the best possible protection and ensures that even if one layer fails, your braids are still covered.
How to Refresh Frizzy Braids or Twists
Even with the best nighttime routine, your braids will eventually need refreshing. This is normal and expected. The goal is not to prevent frizz forever but to extend the time between full re-installs and to keep your style looking good for as long as possible. Here is how to refresh frizzy braids and twists without taking them out.
The Hot Water Dip Method
For box braids and similar styles, dipping the ends in hot water is a classic refresh technique. Bring a pot of water to a near-boil, let it cool slightly until it is hot but not scalding, and dip the last few inches of your braids into the water for a few seconds. The heat seals the cuticle and smooths frizzy ends. This works especially well for braids that use synthetic braiding hair, which responds well to heat.
Be careful not to drip hot water on your scalp or skin. Wrap a towel around your neck and shoulders, and have someone help you if you are doing it for the first time. This method should only be done every few weeks, not daily, because repeated hot water exposure can dry out your natural hair.
The Mousse Refresh
For twists and braids that have lost their definition, a lightweight styling mousse can bring them back to life. Apply a small amount of foaming mousse to your hands and smooth it over the frizziest sections of your braids. Focus on the roots and the crown, which are usually the first areas to frizz. Wrap your braids immediately after applying the mousse and leave them wrapped for at least 30 minutes, or ideally overnight.
The mousse provides hold without stiffness and helps re-seal the cuticle. This is the technique we recommend most often for two-strand twists and passion twists, which tend to lose definition faster than box braids. Avoid gels with high alcohol content, because these will dry out the hair and eventually make frizz worse.
For an extra-effective mousse refresh, apply the mousse to slightly damp braids. The moisture helps the mousse distribute more evenly and penetrate the cuticle better. You can dampen your braids by misting them with water first, then applying the mousse in smoothing motions.
Targeted Re-Twisting and Re-Braiding
For areas that are too frizzy to refresh with product alone, targeted re-twisting is the answer. Identify the three to five worst areas (usually at the crown, the hairline, or the nape of the neck) and re-braid or re-twist just those sections. You do not need to redo your entire head.
Apply a small amount of styling gel or cream to the section before re-braiding, and braid or twist the same way it was originally done. Seal the end with hot water or a small amount of edge control. This targeted approach takes 20 to 30 minutes and can add another one to two weeks of life to your style.
The key is catching problem areas early. If you re-braid a section as soon as it starts to look fuzzy, it blends in seamlessly with the rest of your style. If you wait until it is a tangled mess, it will be harder to fix and may look different from the surrounding braids.
Edge and Hairline Refresh
The edges and hairline are usually the first areas to look frizzy and the most visible. A quick edge refresh can make your entire style look days newer. Use a small amount of edge control gel on an edge brush to smooth your hairline into a sleek finish. Tie a silk scarf around your edges for 10 to 15 minutes after applying the gel to let it set.
For stubborn flyaways at the hairline, a toothbrush with a tiny amount of edge control works even better than an edge brush for precision. This is a salon trick that works at home with no special tools. Clean the toothbrush regularly to avoid applying old product and oils to your edges.
Dry Shampoo and Scalp Refresh
If your scalp looks oily or your braids look dull from product and natural oil accumulation, a dry shampoo or astringent can refresh the appearance without a full wash. Apply witch hazel or a braid-specific dry shampoo along your parts using a cotton swab or an applicator bottle with a nozzle tip. This absorbs excess oil and makes your scalp look freshly cleansed.
This is especially useful for the hairline and the front sections of your braids, which are the most visible. A clean-looking hairline can make braids that are two weeks old look like they were just installed.
Night-by-Night Maintenance Schedule
One of the biggest content gaps we noticed when researching this article is that nobody provides a clear schedule for what to do each night. So here it is, the night-by-night maintenance routine our salon recommends for maximum braid life.
Night 1 (fresh braids): Apply a small amount of lightweight oil to the length of your braids. Wrap with a silk scarf or bonnet. Sleep on a silk pillowcase. Your braids are at their freshest, so minimal intervention is needed.
Night 2: Same routine as night 1. Lightly smooth any flyaways at the hairline with a tiny amount of edge control before wrapping.
Night 3 (when frizz typically begins): Mist braids lightly with a leave-in spray, then seal with oil. Pay extra attention to the crown and hairline. This is when most people first notice frizz, so it is the most important night to stay consistent with your routine.
Night 4-5: Continue the every-other-night moisturizing schedule. Do a scalp check and cleanse with witch hazel if you notice any buildup.
Night 7 (end of week 1): Consider a mousse refresh on any areas that look worn. Do a more thorough scalp cleanse. Check the ends of your braids and dip in hot water if they are starting to look frizzy.
Week 2 and beyond: Continue the same routine. Targeted re-braiding of problem areas may be needed around week 2 or 3, depending on your hair type and braid style. Plan to do a full wash every 1 to 2 weeks to keep your scalp healthy.
Hair Type-Specific Tips for Frizz-Free Braids
Different hair types face different challenges when it comes to braid frizz. Here is how to adapt the general advice above for your specific texture.
4c Hair and High-Density Coily Hair
4c hair is the most prone to frizz in braids because the tight coil pattern means the cuticle is naturally more raised than looser textures. This means friction and moisture loss have a bigger impact. For 4c hair, focus on stronger hold products (gels and mousses rather than just oils) and moisturize more frequently, every one to two days instead of every two to three.
A bonnet with a wide band is essential because 4c hair is often high-density and requires more space. Make sure your bonnet is large enough to contain all your braids without crushing them. Crushing causes its own friction problems and can leave braids looking flat and compressed.
For 4c hair in twists specifically, we recommend applying a curl cream or styling gel before twisting and then sealing with a mousse. This triple-layer approach provides maximum hold and definition. Many of our 4c clients find that gel alone is not enough and that adding mousse as a top coat makes a significant difference in how long their twists stay defined.
Low Porosity Hair
Low porosity hair resists absorbing moisture, which means products sit on the surface instead of penetrating the hair shaft. This can actually be an advantage for braids because it means humidity cannot easily get in either. For low porosity hair, use warm (not hot) water when misting to help open the cuticle slightly. Avoid heavy products, which will sit on the surface and cause buildup.
If you have low porosity hair, you may find that you need to moisturize less frequently than other hair types. The moisture you apply stays on the surface longer, which is good for frizz prevention but means you need to be careful about product accumulation.
High Porosity Hair
High porosity hair absorbs moisture quickly but also loses it quickly, making it prone to both dryness frizz and humidity frizz. For high porosity hair, focus on sealing with oils after moisturizing. The LOC method (without the cream) works well here. Apply a water-based spray, then seal immediately with jojoba or argan oil to lock the moisture in.
High porosity hair benefits from more frequent moisturizing but in smaller amounts. Rather than applying a lot of product every few days, try applying a very small amount daily. This keeps the moisture level consistent without overloading the hair.
Fine or Thin Hair in Braids
Fine hair in braids shows frizz more easily because individual flyaways are more visible against the thinner braid. Use very light products to avoid weighing the hair down, and be gentle when wrapping to avoid creating additional friction. A silk scarf is often better than a bonnet for fine hair because it provides a closer, lighter fit.
Fine hair also tends to slip out of braids more easily, so if you are doing twists, use a styling product with hold to keep the strands together. Avoid heavy oils, which can make fine hair look greasy quickly.
Caucasian and Straight Hair in Braids
If you have straighter or finer hair and are wearing braids or twists, frizz tends to appear as individual stray hairs poking out from the braid. A lightweight anti-frizz serum or a small amount of hair oil smoothed over the surface helps tame these flyaways. Avoid heavy gels, which can look greasy on straight hair textures. A silk pillowcase is usually sufficient overnight protection for these hair types, though a silk scarf adds extra security.
For French braids and Dutch braids on straight hair, a small amount of lightweight mousse applied before braiding and again before bed can help maintain definition. These braid types are popular for Caucasian hair textures and benefit from the same friction-reduction strategies as other braid types.
Braid Type Differences: What to Know About Your Style
Not all braids and twists behave the same way. Here is how the most popular styles differ when it comes to frizz and what you need to know to keep each one looking fresh.
Box Braids: The most durable protective style. Box braids tend to hold their shape well and resist frizz longer than twist styles. The main frizz areas are the roots (where new growth appears) and the ends (where the hair is driest). Box braids with synthetic hair respond very well to the hot water dip method for sealing ends.
Two-Strand Twists: More prone to frizz than braids because twists are not as tightly woven. The twisting action relies on the two strands wrapping around each other, and any friction can cause them to start separating. For two-strand twists, the mousse refresh method is especially important, and you should plan to re-twist problem areas every one to two weeks.
Passion Twists: These use synthetic braiding hair that is deliberately textured and wavy, which means frizz looks different than on smooth braids. Some texture is part of the style, but excessive frizz at the roots indicates it is time for a refresh. Passion twists benefit from lightweight oil applied to the synthetic hair to keep it looking shiny and defined.
Mini Twists: Because they are small, mini twists are the most prone to frizz of all the styles we are covering. More twists mean more ends and more surface area exposed to friction. Mini twists require the most diligent nighttime routine and may need to be refreshed more frequently.
Cornrows: The most frizz-resistant style because the braids are flat against the scalp, which reduces the surface area exposed to friction. Cornrows can last longer than any other protective style with proper care. The main frizz area is the hairline and edges, which need regular attention.
Synthetic Braiding Hair vs Natural Hair
If your braids or twists include synthetic braiding hair (kanekalon, toyokalon, etc.), the frizz behavior is different than braids done with only your natural hair. Synthetic hair does not absorb moisture the way natural hair does, so the moisturizing rules are different.
For synthetic braids, focus your moisturizing efforts on your natural hair at the roots and the parts where your real hair is exposed. Apply oil or leave-in spray to the root area and the first inch or two of the braid where your natural hair is. The synthetic portion does not need regular moisturizing and in fact may look greasy if you apply too much product to it.
Synthetic hair responds very well to the hot water seal method. Dipping the ends in hot water not only seals them against frizz but also sets the curl pattern at the ends. This is why freshly installed box braids with synthetic hair always look so neat at the ends.
One thing to watch for with synthetic hair is that it can develop a dull, fuzzy look over time even without cuticle lifting. This is caused by the fibers themselves becoming roughened from friction. A light application of silicone-based anti-frizz serum can temporarily restore shine, but the only permanent fix is re-installing the affected sections.
Common Mistakes That Cause Overnight Frizz
Sometimes the problem is not what you are failing to do but what you are doing wrong. Here are the most common mistakes we see that cause overnight frizz in braids and twists.
Sleeping on cotton with no protection. This is the number one mistake. Cotton creates friction that lifts the cuticle and absorbs moisture from your braids. Even one night on a cotton pillowcase with no bonnet or scarf can undo days of careful maintenance. If you do nothing else, switch to a silk or satin pillowcase.
Applying gel after braiding instead of before. We see this on forums constantly. People braid their hair and then try to smooth gel over the finished braids to control frizz. This does not work because the gel needs to be in the hair during the braiding process to provide hold from the inside out. Apply your styling product before you start braiding, not after.
Using too much product. More is not better when it comes to braid maintenance. Heavy product application leads to buildup, white flakes, dull-looking braids, and even scalp issues. Stick to small amounts of lightweight products applied every two to three days.
Letting your bonnet slip off and not noticing. If your bonnet or scarf regularly falls off during the night, you need a different one. Try a bonnet with a wider band, an adjustable drawstring, or layer a durag over your scarf for extra hold. The protection only works if it stays on all night.
Washing braids too aggressively or too often. Washing is important for scalp health, but aggressive scrubbing and frequent washing strip moisture from your braids and cause frizz. Wash every one to two weeks using a diluted shampoo applied gently to the scalp, and let the suds run down the braids rather than scrubbing them directly.
Ignoring humidity levels in your bedroom. If your bedroom is extremely dry or extremely humid, your braids are fighting an uphill battle no matter how good your wrapping routine is. A $15 hygrometer and a basic humidifier or dehumidifier can solve this problem permanently.
Skipping the routine for just one night. Consistency is everything. One night of sleeping on cotton with no protection can cause more frizz than a full week of sleeping on silk with proper wrapping. Do not skip your routine, even when you are tired. It takes less than five minutes.
How Long Can Braids Realistically Last With Proper Care?
With the routines outlined in this article, here is how long you can expect different styles to last before they need to be removed or re-installed.
Box braids can last 6 to 8 weeks with proper care. Two-strand twists last 4 to 6 weeks. Passion twists last 4 to 6 weeks depending on the quality of the synthetic hair. Mini twists last 3 to 5 weeks because they are more prone to frizz and matting. Cornrows last 4 to 6 weeks on natural hair and longer with extensions.
Regardless of the style, we recommend removing braids after 8 weeks maximum. Keeping braids in longer increases the risk of matting, breakage, and traction alopecia (hair loss caused by tension on the hair follicles). Even if your braids still look good at 8 weeks, it is time to take them out and give your hair and scalp a break.
Signs that it is time to remove your braids before the 8-week mark include significant matting at the roots, persistent scalp itching or irritation, visible breakage, an unpleasant smell, heavy product buildup that cannot be refreshed, and new growth that is more than an inch long. If you notice any of these signs, do not push it. Remove the braids and give your hair a deep conditioning treatment before re-installing.
After-Care: Preparing for Your Next Install
How you treat your hair after removing braids affects how well your next set will perform. Here is a quick after-care routine to follow when you take your braids out.
Detangle gently before washing. Removing braids reveals hair that has been shed over the past several weeks, and this hair needs to be gently combed out before you wash or it will mat into tangles. Use a wide-tooth comb and work from the ends up to the roots, adding a detangling spray or conditioner for slip.
Do a deep conditioning treatment. Your hair has been in a protective style for weeks and needs serious moisture. Apply a deep conditioner or hair mask and leave it on for at least 30 minutes, or overnight with a shower cap. This restores moisture to the cuticle and prepares your hair for its next style.
Give your scalp a break. Wait at least a few days, ideally a week, between removing one set of braids and installing the next. This gives your scalp time to recover from the tension and allows you to thoroughly cleanse and condition your hair. Rushing from one install to the next without a break is a major cause of traction alopecia and scalp irritation.
Frequently Asked Questions
How to keep braids from frizzing overnight?
To keep braids from frizzing overnight, wrap them in a silk scarf or satin bonnet before bed, sleep on a silk pillowcase, and moisturize lightly every two to three days with a lightweight oil or leave-in spray. Avoid cotton pillowcases, which create friction and lift the cuticle. Gathering long braids into a loose pineapple bun with a silk scrunchie adds extra protection.
How to keep twists from getting frizzy?
To keep twists from getting frizzy, apply a styling mousse or lightweight gel before twisting, not after. Sleep with your twists wrapped in a satin bonnet or silk scarf every night. For two-strand twists and passion twists specifically, use the pineapple method to contain the length and prevent the twists from rubbing against each other or your pillow.
Can braids cause folliculitis?
Yes, braids that are too tight or kept in too long can contribute to folliculitis, which is inflammation of the hair follicles. Product buildup, sweat, and trapped moisture under braids create an environment where bacteria can grow. To prevent this, cleanse your scalp regularly with diluted shampoo or witch hazel, avoid over-applying products, and remove braids after six to eight weeks. Consult a dermatologist if you notice persistent bumps, redness, or itching.
How do I stop my hair from going frizzy at night?
To stop hair from going frizzy at night, switch to a silk or satin pillowcase, wrap your hair in a silk scarf or bonnet, and apply a small amount of lightweight oil or leave-in conditioner before bed. Control your bedroom humidity with a humidifier or dehumidifier, and wear breathable sleepwear to reduce sweating. These steps reduce friction, lock in moisture, and prevent humidity from affecting your hair overnight.
Conclusion
Keeping braids and twists from frizzing after a few nights comes down to three core habits: protecting your hair from friction overnight with silk or satin, maintaining the right moisture balance with lightweight products, and refreshing your style when it starts to look worn. The nighttime routine is the most important piece, so start there if you are feeling overwhelmed. Wrap your braids every night, sleep on silk, and moisturize every two to three days.
If you take away one thing from this guide on how to keep braids and twists from frizzing after a few nights, let it be this: consistency matters more than any single product or technique. One night of cotton pillowcase sleeping undoes a week of careful maintenance. Build the routine, stick with it, and your braids will stay fresh and frizz-free for weeks. At Mercer Street Salon, we have seen clients extend their braid life from two weeks to six or seven simply by adopting these habits. You can do the same at home with a silk pillowcase, a bonnet that stays on, and five minutes of care each night.