
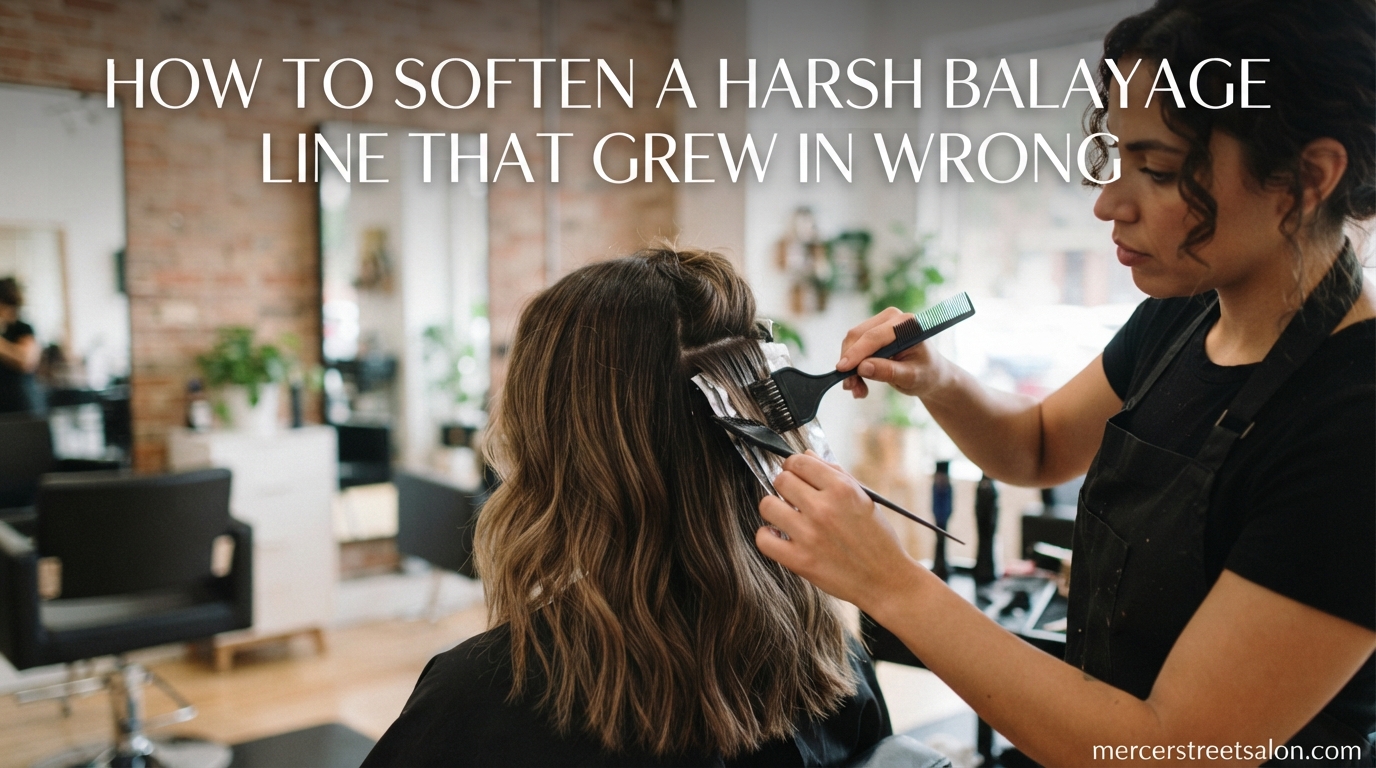
You left the salon feeling amazing. Three weeks later, you are staring at a stripe across your head that looks nothing like the soft, sun-kissed balayage you asked for. If you are dealing with a harsh balayage line that grew in wrong, you are far from alone.
Our team at Mercer Street Salon has seen every type of color correction walk through our doors. We have fixed blocky roots, brassy transitions, visible banding, and grow-outs that look more like stripes than gradients. The good news? Almost every harsh balayage line can be softened.
In this guide, we will walk you through exactly how to soften a harsh balayage line that grew in wrong. We will cover what causes the problem, how to diagnose what type of correction you need, the salon solutions that actually work, what you can do at home, and what to avoid so you do not make things worse.
Whether you are dealing with a botched balayage from a new salon or your once-beautiful color has simply aged into a harsh line of demarcation, this article will give you a clear plan forward. We will also cover how your hair type affects the correction approach, how long each method lasts, and when to see a professional versus trying at-home fixes.
We have spent years refining our color correction process, and the information here reflects what we have learned from hundreds of real corrections. Let us start with the quick answer, then dig into the details.
Table of Contents
The Quick Answer: How to Soften a Harsh Balayage Line
The most effective way to soften a harsh balayage line is a salon root melt or root smudge. A colorist applies a demi-permanent shade matching your natural root level and feathers it downward to blur the visible transition. For tone issues like brassiness, a professional toner or gloss treatment can neutralize unwanted warmth. Lowlights can rebuild dimension if the color looks flat or one-dimensional.
Avoid re-bleaching or applying more lightener at home. The fix is almost always about blending and depositing color, not lifting more pigment. In most cases, a single correction appointment can transform a stark, blocky grow-out into the soft, lived-in gradient you originally wanted.
Now let us break down exactly what is happening on your head and how to fix it properly.
What Is a Harsh Balayage Line (Line of Demarcation)?
A harsh balayage line, technically called a line of demarcation, is a visible hard edge where your natural root color abruptly meets the lighter balayage color. Instead of a soft, seamless gradient, you see a stark stripe or band that makes the color look unnatural and blocky.
This line forms for several common reasons. Balayage is supposed to be a freehand painting technique that creates a soft, lived-in transition between your natural color and the lightened sections. But when the application is too heavy, too close to the scalp, or applied over hair with existing color buildup, the result can be a hard edge instead of a smooth blend.
As your hair grows, the line becomes more obvious. What started as a subtle transition at week one can turn into a visible stripe by week four or five. The natural root pushes down about half an inch per month, and that hard edge gets harder to ignore with every passing week.
It is also worth distinguishing between a harsh line and banding. Banding refers to horizontal stripes or layers of different colors throughout the mid-lengths and ends, usually caused by overlapping applications or inconsistent lightener saturation. A harsh line specifically refers to the transition point between your natural root and the lightened sections.
Both problems are fixable, but they require different approaches. Understanding which one you have is the first step toward getting the right correction.
One more thing to keep in mind. Sometimes what looks like a harsh balayage line is actually just normal grow-out that has reached a tipping point. All balayage eventually grows out, and at a certain point, the transition will become visible. That does not necessarily mean the original application was bad. It just means it is time for a refresh.
Assess What Type of Problem You Have
Before booking a correction or trying anything at home, you need to figure out what is actually happening with your color. The fix for brassy tones is completely different from the fix for blocky roots, and applying the wrong solution can make things worse.
Here is a simple diagnostic framework our stylists use. Look at your hair in natural daylight, pull a few sections forward, and identify which description matches your situation.
Brassy or Orange Tones at the Line
If the harsh line is accompanied by warm, orange, or yellow tones, your toner has likely faded. When toner washes out, the underlying lifted pigment shows through. That warm color is most visible right at the transition point where the contrast between root and lightened sections is highest.
This is one of the easiest problems to fix. A fresh toner or gloss treatment can neutralize the warmth and soften the appearance of the line. If your hair was lifted to a level 7 or 8, a violet-based toner will counteract yellow-orange tones. A blue-based toner works better for darker orange or copper tones.
Check whether the brassiness is uniform or patchy. If it is patchy, you may have uneven lifting from the original service, which requires a more involved correction than a simple toner refresh.
Visible Banding or Stripes
If you see horizontal stripes or distinct bands of different shades throughout your hair, you are dealing with banding. This usually happens when lightener was applied over previously colored hair and lifted unevenly, creating layers of different tones that look like stripes.
Banding requires a more involved correction. A root melt alone will not fix stripes in the mid-lengths. You may need a combination of lowlights to darken the lighter bands, babylights to break up the harsh edges, and a gloss to unify the overall tone.
Run your fingers through the banded areas. If the bands correspond to different textures (some feels rougher or drier), that is a sign of uneven processing that needs professional attention before any color correction.
Dull, Over-Toned, or Muddy Color
If your balayage looks flat, ashy, or muddy rather than bright and dimensional, the color may be over-toned. This happens when too much pigment was deposited, or when toner was left on too long and the hair absorbed more cool tone than intended.
Over-toned hair can look like a single flat color with no dimension. The fix here is not more color. A clarifying treatment or mild color remover can help lift the excess toner, followed by a lighter gloss to restore brightness and dimension.
This problem is tricky because people often mistake over-toned hair for naturally dark or dull hair. If your balayage looked bright right after the appointment and then went muddy within a week, it is almost certainly over-toning, not natural fading.
Blocky Roots and High Contrast
If your roots look solid and dark and there is a hard, visible line where the lightened sections begin, you have classic blocky roots with a line of demarcation. This is the most common complaint we see and the primary focus of this guide.
The fix for blocky roots is root blending. A root melt or root smudge will create a softer transition between your natural color and the balayage. This is what most people need when they search for how to soften a harsh balayage line that grew in wrong.
Blocky roots can also be caused by a DIY root touch-up gone wrong. If you applied permanent box color at the roots to cover your grow-out, the hard edge between the box color and the balayage will be even more stark than natural grow-out. This situation almost always requires professional correction.
High-Contrast Placement from the Original Service
Sometimes the problem is not the grow-out but the original balayage itself. If your stylist placed thick, chunky highlights with high contrast at the root area, the balayage will look harsh from day one, not just as it grows out.
This is different from natural grow-out because the harshness was built into the original look. The fix here involves going back in with babylights, teasy lights, or lowlights to break up the chunky placement and create a more diffused, natural-looking pattern.
Salon Solutions to Soften a Harsh Balayage Line
Once you know what type of problem you have, you can choose the right correction method. Here are the professional techniques that actually work, explained in detail so you know exactly what to expect and what to ask for when you book your appointment.
Each method has its strengths and ideal use cases. Your stylist may recommend one or a combination depending on your specific situation.
Root Melt: The Gold Standard for Blending
A root melt is the most effective salon technique for softening a harsh balayage line. Your stylist applies a demi-permanent color that matches or is slightly lighter than your natural root shade, then feathers it downward into the lightened sections to create a seamless gradient.
The term melt comes from the visual effect. The color literally melts from dark at the root to light at the ends, erasing the harsh line of demarcation. Unlike permanent color, demi-permanent color deposits pigment without lifting your natural base, which means less damage and a softer grow-out.
Here is what happens during a root melt appointment. Your stylist will section your hair into clean, manageable subsections. They apply the blending color at the root area, typically covering the first one to two inches depending on how far the harsh line extends. Using a feathering or sweeping motion with a color brush, they pull the color downward into the transition zone.
The feathering is what creates the gradient. If the color is applied as a solid band, you would just get a new line. The stylist uses varying pressure and angle to create a diffused edge that blends imperceptibly into the lightened sections above and the natural root below.
The color is processed for 15 to 25 minutes, depending on the formulation and your hair porosity. Then it is rinsed, and a gloss or toner may be applied to the lengths to unify the overall color. The entire process typically takes 60 to 90 minutes.
A root melt can be combined with other services in the same appointment. Many of our clients book a root melt every 8 to 12 weeks to maintain a soft, lived-in look as their hair grows. It is the single most effective technique for erasing a visible line of demarcation.
Root Smudge: A Softer, Gentler Approach
A root smudge is very similar to a root melt, and the terms are often used interchangeably in salons. The difference is subtle but real. A root smudge typically uses a finer application and a slightly lighter formulation than a root melt, creating a more diffuse, whisper-soft transition.
Think of it this way. A root melt creates a deliberate, visible gradient from dark to light. A root smudge blurs the line so gently that you cannot tell where the natural root ends and the balayage begins. Both achieve the same goal, but a smudge is ideal for clients who want maximum softness and minimal contrast.
If your balayage line is visible but not extremely stark, a root smudge might be all you need. It is faster than a full root melt and works beautifully on hair that already has some natural blending but needs a little help at the transition point.
A root smudge is also a great option if you are happy with the overall brightness of your balayage and just want to soften the edge. Because the formulation is lighter, it will not darken your overall look the way a deeper root melt might.
Toner and Gloss Treatments for Tone Correction
If your harsh line is partially caused by brassy or warm tones at the transition, a toner or gloss treatment can make a dramatic difference. Toner deposits cool pigments that neutralize unwanted warmth, while a gloss adds shine and adjusts tone at the same time.
Toner is not a permanent fix. It typically lasts 4 to 6 weeks before gradually washing out. But during that time, it can dramatically soften the appearance of a harsh line by evening out the color on either side of the transition. The less contrast there is between the tones at the line, the less noticeable the line becomes.
A gloss treatment is a great maintenance tool between root melt appointments. It refreshes tone, boosts shine, and keeps the color looking intentional rather than grown-out. Many of our clients book a gloss every 4 to 6 weeks to keep their balayage looking fresh.
There is an important distinction between toner and gloss. Toner is formulated specifically to cancel out unwanted tones using complementary colors from the color wheel. A gloss is more about shine and subtle tone adjustment. Some products combine both functions. Your stylist will choose the right one based on whether your main issue is warmth, dullness, or both.
Lowlights to Restore Dimension
Sometimes the problem is not just the line itself but the lack of dimension around it. If your balayage was done with heavy, chunky highlights, the lightened sections can look flat and one-dimensional. Lowlights add darker pieces back into the lightened areas to create depth and break up the harsh transition.
Lowlights are especially effective when combined with a root melt. The root melt softens the line at the top, and lowlights placed throughout the mid-lengths restore the multi-dimensional look that makes balayage beautiful in the first place. The result is a range of tones throughout your hair rather than a two-tone, high-contrast look.
Your stylist will choose a lowlight shade that bridges the gap between your natural root and the lightest pieces. This might be a shade one or two levels lighter than your root, woven sparingly through the lightened sections to create depth without darkening the overall look.
Lowlights are typically applied using foils, similar to traditional highlights but in reverse. The weaving pattern and placement determine how natural the result looks. Finer weaves create a more subtle effect, while thicker weaves add more noticeable depth.
Babylights and Teasy Lights for Seamless Blending
Babylights are ultra-fine highlights woven at the root area to create a soft, natural transition. The weaves are so small and fine that they blend almost invisibly with your natural color, creating a sun-kissed effect rather than a visible line. Think of babylights as the technique that mimics the natural highlights a child gets from spending summers outdoors.
Teasy lights use a backcombing technique before applying lightener. The teasing creates a soft fringe of hair at the base of each foil, which results in a melted, diffused transition with no hard lines. Teasy lights are one of the most popular techniques in modern color correction because they produce a seamless grow-out by design.
Both techniques can be used to soften an existing harsh line. By weaving fine highlights at the transition point, your stylist can break up the hard edge and create a more natural-looking gradient. The existing lightened sections get blended with new fine pieces, creating a softer overall pattern.
These techniques take more time than a root melt because each foil must be woven and placed individually. Expect a longer appointment, but the results can be worth it if you want to maintain brightness while eliminating the harsh line.
Reverse Balayage: When Less Light Is More
Reverse balayage is exactly what it sounds like. Instead of painting lightener from the mid-lengths down, your stylist paints color from the roots down to darken and blend the transition. This technique is ideal for clients whose balayage is too light overall and who want to shift toward a softer, more natural look.
Reverse balayage uses a freehand painting motion similar to traditional balayage, but with deposit-only color instead of lightener. The result is a darker, richer root area that gradually fades into the lighter ends, erasing the harsh line.
This is an excellent option if you want to transition away from high-maintenance light color and move toward a more lived-in, low-maintenance look. It is also a good choice if your hair is overprocessed and cannot tolerate more lightening without risking damage.
Reverse balayage can be combined with a root melt for maximum effect. The root melt handles the first inch or two at the scalp, and the reverse balayage extends the darker color further down to create a longer, more gradual gradient.
Comparison: Which Correction Method Is Right for You?
Here is a side-by-side breakdown of the main correction methods. No competitor currently offers this type of comparison, and it is one of the most common questions we get during consultations. Use this as a starting point, but your stylist will make the final recommendation based on an in-person assessment.
Root Melt: Best for softening a harsh line of demarcation. Uses demi-permanent color blended from root downward with a feathering technique. Lasts 8 to 12 weeks. Ideal for blocky roots and high contrast. Book this if your main complaint is a visible stripe at the transition point between your natural root and the balayage.
Root Smudge: Best for mild to moderate harshness. Similar to a root melt but with a softer, more diffuse application and lighter formulation. Lasts 8 to 12 weeks. Ideal for clients who want maximum softness without darkening the overall look. Book this if your line is visible but not extremely stark.
Toner or Gloss: Best for brassy, warm, or faded tones at the line. Does not physically move the line but neutralizes color to make it less noticeable. Lasts 4 to 6 weeks. Book this if the line looks harsh primarily because of brassiness or uneven tone rather than high-contrast placement.
Lowlights: Best for flat, one-dimensional color. Adds darker pieces to restore depth and break up chunky highlights. Lasts 8 to 12 weeks. Book this if your balayage looks heavy and lacks dimension. Often combined with a root melt for a full correction.
Babylights or Teasy Lights: Best for breaking up a hard edge with fine, blended highlights. Lasts 8 to 12 weeks, sometimes longer. Book this if you want to soften the line while maintaining overall brightness. Requires a longer appointment due to the precision involved.
Reverse Balayage: Best for clients who want to go darker and softer overall. Uses deposit-only color painted from roots down. Lasts 8 to 12 weeks. Book this if you are ready to move away from high-maintenance light color toward a more lived-in, low-maintenance look.
In practice, your stylist may recommend combining methods. A root melt plus lowlights is a common pairing for severe corrections where both the line and the lack of dimension need addressing. A root smudge plus gloss is great for maintenance between full corrections. Babylights plus a root melt can handle even the harshest grow-out lines.
How Hair Type and Porosity Affect Your Correction
No competitor currently addresses this topic, but it matters a lot. Your hair type and porosity directly affect how color deposits, how long corrections last, and which technique will give you the best result. The same root melt can look completely different on two people with different hair characteristics.
If you have high-porosity hair, your cuticle is more open and absorbs color quickly but also releases it faster. This means root melts and toners may fade more quickly than expected. Your stylist might use a stronger formulation, extend processing time slightly, or recommend more frequent gloss treatments to maintain the blend between appointments.
Low-porosity hair resists color absorption. The cuticle is tightly closed, so demi-permanent color may sit on the surface and wash out quickly without properly penetrating. Your stylist may need to use gentle heat during processing to open the cuticle, or choose a formulation specifically designed for resistant hair.
If you have fine hair, heavy root melts can weigh your color down and make it look flat. Your stylist will likely use a lighter formulation and finer application to avoid creating a heavy, dark band at the roots. Babylights and teasy lights work beautifully on fine hair because they add dimension without bulk.
Coarse or thick hair can handle more aggressive correction. The added density means your stylist can apply deeper root melts and more lowlights without the color looking heavy or unnatural. Coarse hair also tends to hold demi-permanent color longer, so your correction may last closer to 12 weeks rather than 8.
Curly and textured hair needs special consideration. The curl pattern can hide or emphasize a harsh line depending on how the hair falls. A tight curl pattern might obscure a line that would be very visible on straight hair. Your stylist should account for how your curls cluster and where the line sits when the hair is in its natural, unstretched state.
Previously processed hair requires extra caution. If your hair has been colored multiple times, relaxed, or permed, the porosity may be inconsistent from root to ends. Your stylist will need to adjust formulations section by section to account for these variations and avoid creating new problems while fixing the line.
What You Can Do at Home to Soften the Appearance
While you wait for your correction appointment, there are several things you can do at home to soften the appearance of a harsh balayage line. These will not fix the underlying problem, but they can make it less noticeable and help you feel more confident in the meantime.
Use a purple or blue shampoo. If brassiness is making the line look worse, a pigmented shampoo can help neutralize warm tones. Purple shampoo counteracts yellow tones, while blue shampoo targets orange and copper. Use it once or twice a week, not every wash, to avoid over-toning and buildup.
Try a gloss or glaze at home. Temporary gloss treatments can add shine and subtly adjust tone, making the transition look more intentional. These wash out after a few shampoos, so they are a low-commitment option. Look for products labeled as tone-enhancing or color-depositing glosses.
Style with waves or curls. Straight hair shows harsh lines more dramatically because the color falls in a solid sheet. Adding texture with curls or waves breaks up the visual line and makes the transition look softer. A curling iron, wand, or even heatless curl methods can make a big difference.
Use root touch-up spray or powder. If your roots are significantly darker than the balayage, a temporary root touch-up product in a shade close to your lightened color can blur the line. This is a temporary cosmetic fix, not a real correction, but it works well for photos and events.
Apply a deep conditioning mask weekly. Healthy hair reflects light better and looks more uniform in color. A weekly mask keeps your hair in good condition, which helps the overall appearance while you wait for your salon appointment. Look for masks designed for color-treated hair.
Avoid hot water when washing. Hot water opens the cuticle and accelerates color fade, which can make toner wash out faster and brassiness appear sooner. Wash with lukewarm or cool water to preserve tone and extend the life of any color you have left.
Protect your hair from heat and sun. UV rays and hot tools both contribute to color fade and brassiness. Use a heat protectant before styling and consider a UV-protective spray if you spend time outdoors. Sun exposure can oxidize color molecules and bring out warmth you did not have before.
Sleep on a silk or satin pillowcase. Cotton pillowcases create friction that can rough up the cuticle and cause color to fade faster. Silk and satin reduce friction, which helps preserve color and keeps hair looking smoother and shinier between washes.
Consider a semi-permanent root concealer. Products like colored dry shampoo or root concealers can temporarily darken or lighten the root area to reduce contrast. These are not permanent solutions, but they can buy you time and confidence while you wait for professional help.
What to Avoid When Fixing a Harsh Balayage Line
Some well-meaning attempts to fix a harsh line can make the problem significantly worse. Here are the most common mistakes we see in our salon and why you should avoid them at all costs.
Do not bleach or apply lightener at home. Applying more lightener to the root area will not soften the line. It will create more damage and potentially cause breakage, especially if your hair is already processed. Blending is about depositing color, not lifting more pigment. You risk turning a correctable line into a chemical cut.
Do not use box dye to fix it. Box dye from the drugstore is permanent color with high developer strength designed to work on a range of hair types. It can create a new line of demarcation, cause color buildup that is extremely difficult to remove, and make a professional correction much harder and more expensive. Save your money for the salon.
Do not over-tone with purple shampoo. Using purple shampoo every day can leave a dull, ashy buildup on your hair that looks muddy and flat. This masks the problem temporarily but creates a new one. Stick to once or twice a week, and alternate with a regular color-safe shampoo.
Do not apply color remover without professional guidance. Color remover can strip toner and semi-permanent color, but it can also leave your hair in an unpredictable raw state. If you use it wrong, you could end up with patchy, uneven color that is harder to correct than the original problem. Color removal is best left to a professional.
Do not wait too long to seek help. The longer you live with a harsh line, the more it grows out and the more noticeable it becomes. If you know something is wrong, book a consultation sooner rather than later. A correction at week 4 is easier and cheaper than a correction at week 16.
Do not go back to a stylist who already botched it. This is a tough one, especially if you are trying to be polite or avoid an awkward conversation. But if the original balayage was done poorly, going back for a correction from the same person is risky. Find a stylist who specializes in color correction and has experience fixing balayage specifically.
Do not panic and make impulsive decisions. We see clients who, out of frustration, book the cheapest correction they can find or try five different at-home fixes in one week. Both approaches tend to make things worse. Take a breath, do your research, and choose one qualified professional to handle the correction.
When to See a Professional vs At-Home Fixes
Some minor issues can be managed at home temporarily. But certain situations require professional help. Here is a diagnostic checklist to help you decide which path is right for you.
You need a professional if:
Your balayage has visible banding or stripes throughout the mid-lengths and ends, not just at the root line. Banding correction requires multiple techniques applied simultaneously, which is beyond any at-home solution.
Your hair feels damaged, fragile, or stretchy when wet. Processing already-compromised hair with any additional chemicals at home can cause breakage or hair loss. A professional can assess the structural condition and use bond-protective products during the correction.
You have already tried fixing it at home and made it worse. Color buildup from multiple DIY attempts creates a complex canvas that requires professional-grade correction. The more layers of home color you add, the harder and more expensive the fix becomes.
Your harsh line is caused by high-contrast placement, not just faded tone. If the original balayage was placed with thick, chunky highlights close to the scalp, no amount of at-home toner will soften that line. You need a root melt or lowlights applied by a professional.
You want a significant change in the overall look. If you want to go darker, add dimension, or transition away from balayage entirely, this requires professional-level color theory and application that cannot be safely replicated at home.
At-home fixes are OK if:
Your only issue is mild brassiness and the line itself is relatively soft. Purple shampoo and a home gloss can tide you over until your next appointment.
You are waiting for a consultation and just need the color to look less harsh for a week or two. Temporary root powder, styling with waves, and a deep conditioning mask are all reasonable stopgaps.
Your hair is in good condition with no signs of damage, and you are comfortable using color-depositing products that are specifically designed for at-home use between salon visits.
How Long Does a Balayage Correction Last?
This is a question we hear constantly, and no competitor currently covers it. The short answer is that a well-done correction lasts about 8 to 12 weeks before you will want a maintenance appointment. But the exact timeline depends on which correction method was used and how you care for your hair afterward.
A root melt or root smudge using demi-permanent color gradually fades over 8 to 12 weeks. As it fades, the line of demarcation becomes slightly more visible, but because the demi-permanent was deposited rather than lifted, the fade is soft and gradual rather than abrupt. You will not wake up one day with a harsh line reappearing.
Toner and gloss treatments are shorter-lived. Expect 4 to 6 weeks of tone correction before warmth starts to creep back in. Many clients book a gloss every 4 to 6 weeks between root melt appointments to keep everything looking fresh and prevent brassiness from returning.
Lowlights last longer than toner but may need refreshing every 10 to 12 weeks as they fade and your hair grows. Babylights and teasy lights grow out beautifully and can last 12 to 16 weeks before the root area needs attention, which is why these techniques are so popular for low-maintenance color.
The best maintenance schedule combines a root melt every 8 to 12 weeks with a gloss every 4 to 6 weeks. This keeps the transition soft and the tone fresh, so you never reach the point where the harsh line becomes visible again. Think of it like getting regular oil changes to prevent bigger problems down the road.
Your at-home care routine also affects how long the correction lasts. Using sulfate-free shampoo, washing less frequently, protecting from heat, and avoiding chlorine all help extend the life of your correction. The better you care for your color, the longer it will look fresh.
Preparing for Your Correction Appointment
Once you have booked your correction, a little preparation can make the appointment go more smoothly and ensure you get the results you want. Here is what we recommend to our clients before a color correction service.
Bring reference photos of what you wanted your balayage to look like originally. This helps your new stylist understand your goal and gives them a target to work toward. Photos are more effective than verbal descriptions because color terms can mean different things to different people.
Be honest about your hair history. Tell your stylist everything you have used on your hair in the past two years, including box dye, henna, at-home glosses, and any previous professional services. Hidden color history is the number one cause of unexpected results during correction.
Wash your hair 24 to 48 hours before your appointment with a clarifying shampoo. This removes product buildup and gives your stylist a clean canvas to work with. Do not apply any styling products after that wash.
Come with realistic expectations. A correction may not be able to achieve exactly what you wanted in a single session, especially if there is significant damage or color buildup. Your stylist will give you an honest assessment of what is achievable and how many sessions it might take.
Ask questions during the consultation. A good color correction specialist will welcome questions about their process, the products they use, and what you can expect during and after the appointment. If they seem rushed or dismissive, that is a red flag.
Frequently Asked Questions About Softening a Harsh Balayage Line
How to fix a botched balayage?
Fixing a botched balayage starts with a professional consultation to assess the damage. Most corrections involve a root melt or root smudge to blend the harsh line, lowlights to restore dimension, and a toner to unify the color. Avoid re-bleaching or using box dye at home, which can make the problem worse. A skilled color correction specialist can usually fix the issue in one to two sessions.
How to fix outgrown balayage?
An outgrown balayage is best fixed with a root melt or root smudge. Your stylist applies a demi-permanent color matching your natural root and feathers it downward to create a seamless gradient. This softens the line of demarcation and extends the life of your balayage without re-lightening. Book maintenance every 8 to 12 weeks for a soft, lived-in grow-out.
How to fix a harsh highlight line?
A harsh highlight line is caused by a visible line of demarcation between your natural root and the lightened sections. The fix is a root melt, where demi-permanent color is blended from the root into the highlights to create a soft gradient. A gloss treatment can also help neutralize tone differences. Avoid applying more lightener, which increases damage without softening the line.
What to do if I don’t like my balayage?
If you do not like your balayage, book a consultation with a color correction specialist. Do not try to fix it at home. Depending on the issue, the fix may be a toner adjustment, a root melt to soften harsh lines, lowlights to add dimension, or reverse balayage to go darker. Bring reference photos of what you wanted so your new stylist understands your goal.
Can you soften a harsh balayage line without bleaching again?
Yes, absolutely. The most common and effective fix for a harsh balayage line is a root melt or root smudge, which uses demi-permanent deposit-only color to blend the transition. No additional bleaching or lightening is needed. In fact, re-bleaching can make the problem worse by causing damage and creating new lines of demarcation.
Is a root melt the same as a root smudge?
The terms are often used interchangeably, but there is a subtle difference. A root melt creates a deliberate gradient from dark at the root to light at the ends. A root smudge uses a softer, more diffuse application for a whisper-soft transition. Both achieve the same goal of blending a harsh line, but a smudge is ideal for maximum softness.
Will purple shampoo fix a harsh root line?
Purple shampoo can help if brassiness is making the line look more harsh, but it will not physically move or blend the line itself. Purple shampoo neutralizes yellow tones through temporary pigment deposit. If the harsh line is caused by high-contrast placement rather than brassiness, you need a professional root melt or smudge to fix it.
How long should I wait before getting a balayage correction?
You can book a correction consultation as soon as you notice the problem. There is no mandatory waiting period. If your hair feels healthy, a stylist can proceed with a root melt or toner right away. If your hair feels damaged from the original service, your stylist may recommend a bond repair treatment first before applying any additional color.
Final Thoughts on Softening a Harsh Balayage Line
Learning how to soften a harsh balayage line that grew in wrong comes down to one key principle. Blending is about depositing color, not lifting more. A root melt, root smudge, or gloss treatment from a skilled colorist can transform a stark, blocky grow-out into the soft, seamless, lived-in color you originally wanted.
Our advice is simple. Get a professional diagnosis before trying any fixes at home. Avoid DIY solutions that involve bleach, box dye, or color removers. Book a consultation with a stylist who specializes in color correction and has a portfolio of before-and-after photos you can review.
Bring reference photos, be honest about your hair history, and trust the process. A good correction takes time, but the results are worth it. Your balayage does not have to stay harsh. With the right professional help, you can get back to loving your hair again.
If you are dealing with a harsh balayage line right now, we are here to help. Our color correction specialists at Mercer Street Salon have the experience and expertise to assess your situation and recommend the best path forward. Book a consultation and let us help you fall back in love with your color.