
Every person who has ever grown their hair out knows the feeling. You sit down in the salon chair, ask for “just a trim,” and watch in slow motion as what feels like half your hair falls to the floor. You leave wondering what happened and whether you will ever trust another stylist again.
If you have ever walked out of a salon with shorter hair than you wanted, you are not alone. Reddit threads, forum posts, and group chats are filled with people sharing the same frustrating story of asking for an inch and losing three. The anxiety around trim length loss is real, and it keeps many people from getting the routine maintenance their hair actually needs.
Learning how to tell how much length you actually lose in a trim changes everything. When you can measure your hair before and after a cut, communicate clearly with your stylist, and understand what different trim amounts look like, you take back control of the process. No more surprises, no more regret, no more avoiding the salon until your split ends become unmanageable.
In this guide, we will walk you through five practical measurement techniques you can use at home, a visual guide to what different trim amounts look like on real hair, and a proven communication script for salon visits. We will also cover the factors that affect how much length comes off, compare trim techniques, and answer the most common questions about trim length loss.
Table of Contents
Quick Answer: How Much Length Does a Trim Actually Remove?
A typical trim removes between 1/4 inch and 1 inch of hair from the ends. The exact amount depends on the level of damage, your hair type, and what you communicate to your stylist. Anything beyond 1 inch starts crossing into haircut territory rather than a maintenance trim. Most people who feel they “lost too much length” actually lost 1 to 2 inches but perceived it as more because the visual difference at the ends is disproportionate to the actual measurement.
Here is the breakdown of common trim amounts and how they feel:
A dusting removes 1/8 to 1/4 inch, which is barely visible and meant only to clean up the very tips. A standard trim removes 1/4 to 1/2 inch, which refreshes the ends without noticeable length change. A deep trim removes 1/2 to 1 inch, which you can see but does not dramatically change your overall length. Anything over 1 inch is generally considered a haircut rather than a trim.
The key insight is that a trim and a haircut are not actually different services from a stylist’s perspective. The word “trim” simply describes the intention behind a smaller cut. Understanding this distinction helps you communicate more effectively and set realistic expectations.
What a Trim Actually Is (vs a Haircut)
One of the biggest sources of confusion in salons is the difference between a trim and a haircut. The truth might surprise you: professionally speaking, there is no technical difference. A trim is a haircut. The word “trim” is what clients use to signal they want minimal length removed, but to a stylist, both services involve the same cutting technique, the same tools, and the same amount of work.
This matters because many people believe a trim costs less, takes less time, or uses a different technique than a haircut. None of that is true. Your stylist picks up the same scissors, sections your hair the same way, and cuts with the same precision whether you call it a trim or a haircut. The only difference is how much hair comes off the ends.
The perception gap is where problems start. When you say “just a trim,” you might mean 1/4 inch. Your stylist might interpret that as anywhere from 1/2 inch to a full inch depending on what they see when they assess your ends. If your hair has significant damage, a stylist may feel they need to remove more to get past the split ends and give you healthy-looking results.
America’s Beauty Show put it well: most people say “trim” when they really mean “I do not want to lose too much length.” But a trim to a customer is a cut to professionals. This is why learning to communicate in concrete terms, rather than relying on the word “trim” alone, makes such a big difference in your salon experience.
Here is a quick definition breakdown to keep things clear:
A trim removes 1/4 to 1 inch of hair, focuses on the ends, and is meant to maintain your current style and remove split ends. A haircut removes more than 1 inch, may change your style or shape, and often involves reshaping layers or adjusting the overall silhouette. A dusting removes 1/8 to 1/4 inch and is purely about cleaning up the very tips without any visible length change.
How to Tell How Much Length You Actually Lose in a Trim: 5 Measurement Methods
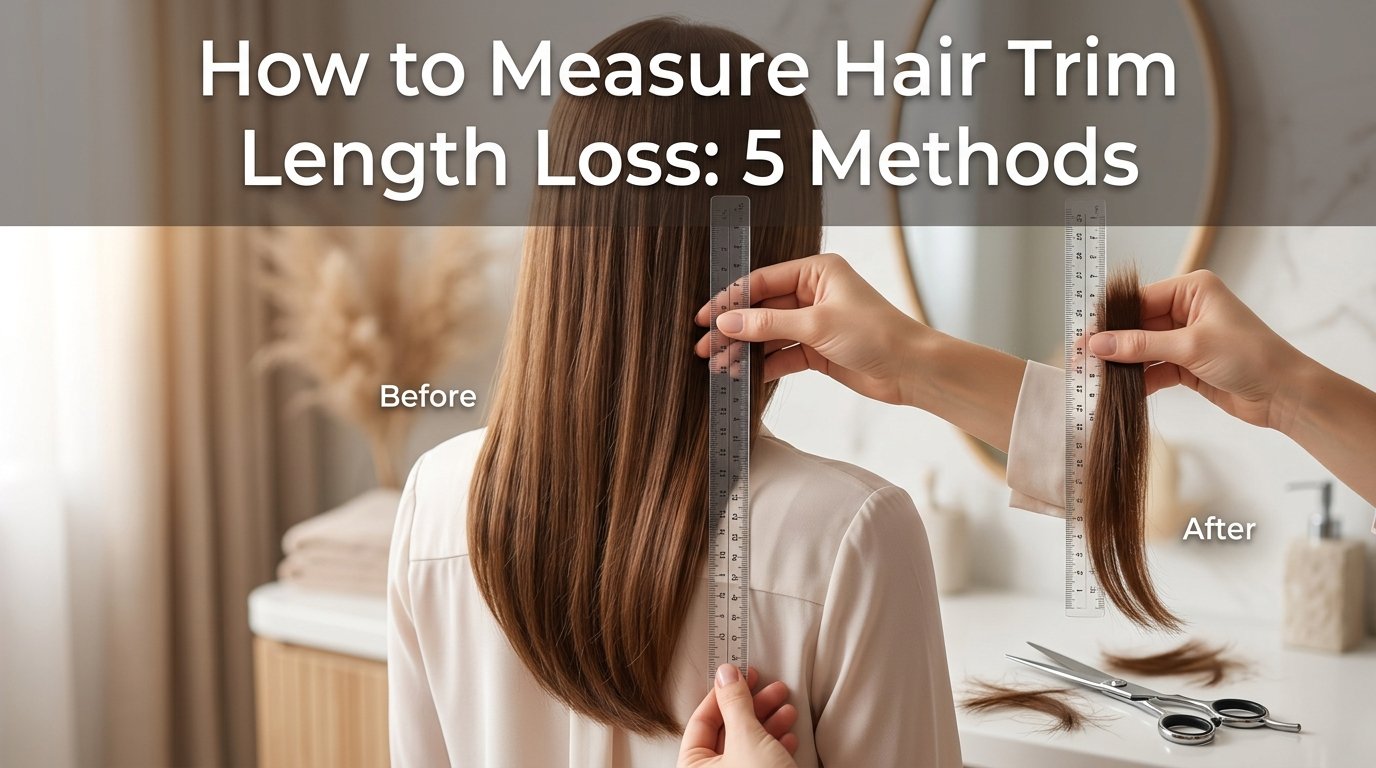
This is the section no other guide covers. Below are five practical, at-home methods to measure exactly how much length you lose in a trim. Use these before and after your salon visit to track your results and build confidence in your stylist relationship.
Method 1: The Ruler and Reference Point Technique
This is the most accurate method and requires only a flexible measuring tape or ruler. Before your appointment, stand in front of a mirror and identify a fixed reference point on your body. Good options include the top of your shoulder, the bottom of your earlobe, your collarbone, or a specific freckle or mole on your neck.
Measure the distance from your reference point to the longest part of your hair. Write this number down. After your trim, measure again from the same reference point to the longest part of your hair. The difference tells you exactly how much length was removed.
For example, if your hair measured 4 inches past your collarbone before the trim and 3.5 inches after, you lost half an inch. This method eliminates guesswork and gives you hard data. Take a photo of your measuring tape against your hair for an extra layer of documentation.
The ruler method works best on straight, wet hair because curly or textured hair stretches and shrinks, making measurements less reliable. If you have curly hair, measure your hair in its natural, dry state both times for consistency.
Method 2: The Finger Width Method
Your fingers are surprisingly consistent measuring tools, and they are always with you. The average adult index finger is about 1/2 inch wide at the first knuckle, and the average pinky finger is about 1/4 inch wide. These are approximations, but they give you a quick visual reference.
Before your trim, hold a section of your hair at the very end and pinch it between your fingers at the point where you want the cut to stop. Note how many finger widths of hair extend beyond your pinch point. After the trim, do the same measurement. The difference, expressed in finger widths, tells you roughly how much was removed.
This method is less precise than the ruler technique, but it is fast and works in any situation. Many experienced long-hair enthusiasts use the finger method because it translates directly to how stylists section and hold hair during cutting. One finger width equals roughly 1/2 inch, two finger widths equals about 1 inch, and half a finger width is close to 1/4 inch.
Method 3: The Coin Comparison Method
Coins provide fixed, standardized measurements that most people have on hand. A US penny is about 3/4 inch in diameter. A nickel is about 13/16 inch. A dime is about 11/16 inch. A quarter is about 15/16 inch, very close to a full inch.
Hold a coin next to the ends of your hair before your trim to visualize how much you want removed. If you want a 1/2 inch trim, that is roughly two-thirds of a penny diameter. If you want a 1/4 inch trim, visualize half a dime. After your cut, hold the same coin against the trimmed ends to estimate what was actually removed.
The coin method is particularly useful for showing your stylist exactly how much you want cut. Instead of saying “just a half inch,” you can hold up a penny and say “I want about this much off the ends.” Visual references eliminate the measurement mismatch that causes so many trim disasters.
Method 4: The Photo Comparison Method
Photos do not lie, and they create a permanent record of your hair length before and after a trim. Before your appointment, take three photos: one from the front, one from the side, and one from the back. Stand in the same spot with the same lighting each time.
Pull your hair straight down or straight back so the ends are clearly visible. Wear the same shirt or a similar neckline so your reference point stays consistent. After your trim, take the same three photos in the same position and compare them side by side.
This method is especially powerful because it captures the visual impact of the trim, not just the raw measurement. A 1/2 inch trim on fine hair looks very different from a 1/2 inch trim on thick hair. Photos help you understand how different trim amounts translate to your specific hair type and density.
Over time, building a photo library of your trims helps you identify your ideal trim frequency and amount. You will start to see patterns like “every 10 weeks, a 1/4 inch trim keeps my ends healthy without noticeable length loss.”
Method 5: The Hair Elastic Marking Method
This method uses a hair elastic to mark a specific point on your hair shaft before and after trimming. Before your appointment, tie a small, light-colored elastic band around a section of hair at the very bottom, as close to the ends as possible. Slide it up exactly 1 inch from the tips and secure it.
After your trim, look at where the elastic sits relative to your new ends. If the elastic is 1/2 inch from your new ends, you lost 1/2 inch. If it is 3/4 inch from the new ends, you lost 3/4 inch. Remove the elastic once you have your measurement.
This method works well for people who want a real-time check during the trim itself. You can ask your stylist to cut below the elastic so you know exactly how much is coming off. Just be sure to remove the elastic before leaving the salon.
Visual Guide: What Different Trim Amounts Look Like
One of the biggest content gaps in the hair care space is a visual guide to trim amounts. No competitor provides this, yet it is exactly what people need. Here is a detailed description of what each trim amount looks like on real hair so you can visualize it before your appointment.
What a 1/4 Inch Trim Looks Like
A 1/4 inch trim, also called a dusting, removes barely visible length. On straight hair, the cut ends look almost identical to before, just slightly cleaner and more uniform. You would struggle to tell the difference in a before-and-after photo unless you were looking for it.
On curly or wavy hair, a 1/4 inch trim may look like nothing changed at all because the curl pattern springs back and masks the small reduction. This amount is ideal if you are actively growing your hair out and just want to prevent split ends from traveling up the hair shaft.
To visualize 1/4 inch, look at the width of a standard pencil lead. It is about the thickness of two stacked quarters. This is the smallest amount most stylists will remove in a single pass, and many use a dusting technique that barely grazes the ends.
What a 1/2 Inch Trim Looks Like
A 1/2 inch trim is the most common request and produces a subtle but noticeable refresh. On straight hair, you can see that the ends look thicker and healthier, and the overall length appears very slightly shorter. Most people will not notice the difference unless you point it out, but you will feel it.
On curly hair, a 1/2 inch trim may spring the curl up slightly, making your hair look 1 to 2 inches shorter overall due to the shrinkage factor. This is a critical point for curly-haired individuals to understand: a 1/2 inch trim can look like 2 inches because of how curls contract after cutting.
To visualize 1/2 inch, look at the width of your index finger at the first knuckle. It is about the height of a stack of four quarters. This is the sweet spot for maintenance trims that keep ends healthy without sacrificing growth progress.
What a 1 Inch Trim Looks Like
A 1 inch trim produces a clearly visible length change. On straight hair, you and everyone around you will notice the difference. The ends will look significantly healthier and thicker, but you will also see the length reduction in the mirror.
On curly hair, a 1 inch trim can make your hair look 2 to 3 inches shorter due to curl shrinkage. This is where many people feel “trim shock” even though the stylist did exactly what was asked. If you have curly hair and are worried about this, ask your stylist to cut your hair dry, curl by curl, so you can see the actual length being removed.
To visualize 1 inch, look at the length from the tip of your index finger to the first knuckle. It is about the diameter of a US quarter. This amount is appropriate for hair with moderate damage or for someone who has not had a trim in 4 to 6 months.
What 2 Inches and Beyond Looks Like
At 2 inches and beyond, you are firmly in haircut territory. The length change is dramatic and obvious on all hair types. This amount is typically reserved for significant damage removal, style changes, or corrective work after neglecting trims for an extended period.
If your stylist recommends 2 or more inches, it usually means your split ends have traveled further up the hair shaft than you realized. In this case, ask to see the damage in the mirror so you understand why the larger cut is necessary. A good stylist will happily show you the breakage and explain their reasoning.
How to Communicate Your Desired Trim Length to Your Stylist
The single most common cause of unwanted length loss is poor communication between client and stylist. A highly upvoted Reddit PSA from the longhair community drives this point home: stop asking for your trim in inches. Instead, physically show your stylist exactly how much you want removed.
This advice works because of a fundamental measurement mismatch. When you say “an inch,” you picture the amount you want removed. When your stylist hears “an inch,” they may picture a different amount based on their training, experience, and visual assessment of your hair. Eliminating the verbal measurement and replacing it with a physical demonstration removes all ambiguity.
The “Show, Don’t Tell” Method
Here is the step-by-step process for showing your stylist exactly how much you want cut. This method comes directly from hairstylist advice and is the most reliable way to get the trim you want.
Step 1: Pull a small section of your hair taut at the very bottom. Step 2: Pinch the exact amount you want removed between two fingers. Step 3: Hold that pinched section up so your stylist can see it clearly. Step 4: Say “this is the amount I want off, no more.” Step 5: Ask your stylist to confirm they see the amount before they start cutting.
This takes about 10 seconds and eliminates the most common source of trim anxiety. Your stylist can see exactly what you mean, and you have created a shared visual reference that both of you can check against during the cut.
Phrases That Work and Phrases That Don’t
Some phrases set you up for success, and others create room for misinterpretation. Here is what to say and what to avoid.
Use these phrases: “I want to keep as much length as possible.” “This is exactly how much I want removed” (while showing with your fingers). “Please check in with me before cutting more than what I showed you.” “My priority is length retention, so please be conservative.” “Can you show me the first section after you cut it so I can confirm the amount?”
Avoid these phrases: “Just a trim” (too vague). “About an inch” (measurement mismatch risk). “However much you think it needs” (gives full control to the stylist). “Just clean it up” (could mean anything). “Do what you think is best” (invites a larger cut than you might want).
What to Do Mid-Cut If You Are Uncomfortable
If your stylist starts cutting and you see more hair falling than expected, speak up immediately. You are not being rude by stopping the process. A simple “excuse me, that looks like more than I wanted, can we check the amount?” is perfectly appropriate.
Any good stylist will welcome this feedback. They would rather pause and confirm than finish the cut and have an unhappy client. Remember that hair grows back, but preventing an unwanted larger cut in the moment is always worth a slightly awkward interruption.
Factors That Affect How Much Length You Lose
Several variables influence how much length actually comes off during a trim, beyond what you ask for. Understanding these factors helps you anticipate outcomes and choose the right timing for your appointment.
Hair Type and Texture
Curly and coily hair is particularly tricky when it comes to trim length. When curly hair is cut wet and stretched straight, a 1/2 inch trim can result in 1 to 2 inches of visible length loss once the hair dries and shrinks back to its natural curl pattern. This is why many curly hair specialists recommend dry cutting, where each curl is cut individually in its natural state.
Fine hair tends to show trim length more dramatically because each strand is thinner. Removing 1/2 inch from fine hair can look like more compared to thick hair because there is less density to mask the reduction. Thick hair, on the other hand, can absorb a 1 inch trim without looking noticeably shorter.
Damage Level
The more damaged your ends are, the more your stylist will need to remove to get past the split ends and breakage. If you have not had a trim in 6 months or longer, expect a larger cut than someone who trims every 8 weeks.
Split ends do not just sit at the bottom of the hair shaft. They can travel upward, splitting the hair 1 to 2 inches above the tip. To remove the damage completely, your stylist has to cut above the highest point of splitting, which may mean more length than you anticipated.
Stylist Experience and Specialization
Stylists who specialize in long hair or curly hair tend to be more conservative with trim amounts. They understand the anxiety around length loss and have techniques like dusting and point cutting that minimize reduction while still refreshing the ends.
Stylists who primarily work with shorter styles or frequent restyling may be more aggressive with trims. They may also interpret “trim” differently based on their client base. If length retention is your priority, seek out a stylist who explicitly works with long hair or your specific hair type.
The Technique Used
Different cutting techniques remove different amounts of length even when the stylist intends the same result. A blunt cut removes a clean, consistent amount. Point cutting removes less visible length because the scissors cut into the hair at an angle, creating texture without blunt reduction. Dusting removes the absolute minimum. We cover these in detail in the next section.
Trim Techniques Compared: Dusting vs Point Cutting vs Blunt Cut
The technique your stylist uses directly affects how much visible length you lose. Here is a comparison of the three most common trim methods so you can request the one that best fits your goals.
Dusting removes 1/8 to 1/4 inch and is the most conservative option. The stylist uses the very tips of the scissors to lightly graze the ends, removing only split tips and damaged tips. This technique is ideal if you are actively growing your hair and want to maintain maximum length. It is sometimes called “velvet trimming” because the stylist cuts so little that the cut hair feels like velvet dust on the floor.
Point cutting removes a moderate amount while creating texture. The stylist holds the scissors vertically and cuts into the ends of the hair at an angle rather than straight across. This creates a softer, more natural-looking end without the blunt line of a traditional cut. Point cutting can remove anywhere from 1/4 to 1 inch depending on how deep the stylist cuts into the section. It is a good choice for people who want refreshed ends without a hard, solid line.
Blunt cutting removes a clean, consistent amount in a straight line. The stylist sections the hair and cuts straight across, creating a sharp, defined edge. This technique is necessary for maintaining bob shapes, one-length styles, and any look that relies on a solid perimeter. Blunt cutting gives the most predictable, measurable length removal but also produces the most visible difference.
Requesting a specific technique gives you another layer of control over your trim outcome. If you want minimal length loss, ask for a dusting. If you want soft, textured ends with moderate length removal, ask for point cutting. If you want a clean, sharp line with predictable reduction, ask for a blunt cut.
Tips to Minimize Length Loss During a Trim
If length retention is your primary goal, these strategies will help you get the most out of every trim while losing the least amount of hair.
Get trims more frequently. Counterintuitively, trimming every 8 to 12 weeks results in less total length loss over time than waiting 6 months between appointments. Small, regular trims remove split ends before they travel up the shaft and force a larger corrective cut. A 1/4 inch trim every 10 weeks removes about 1.3 inches per year. A 2 inch corrective cut every 6 months removes 4 inches per year. Frequency is your friend.
Prevent damage between trims. Use heat protectant every time you style with hot tools. Sleep on a silk or satin pillowcase to reduce friction breakage. Avoid tight hairstyles that stress the hair shaft. Deep condition regularly to maintain elasticity and prevent the brittleness that leads to split ends.
Ask about at-home dusting. Some stylists teach their clients how to dust their own ends between appointments using sharp, professional-grade scissors designed specifically for hair. This is not a replacement for professional trims, but it can extend the time between salon visits and reduce the amount removed at each appointment.
Choose your stylist carefully. Look for someone who explicitly works with long hair, curly hair, or your specific hair type. Read reviews that mention length retention and conservative trims. Book a consultation before the actual appointment to discuss your goals and make sure you and the stylist are on the same page.
Track your trims. Use the measurement methods from earlier in this guide to record how much length you lose at each appointment. Over a year, you will have data showing your average trim amount and can adjust your frequency or stylist communication accordingly.
FAQs
What is the 2.25 rule for haircuts?
The 2.25 rule is a guideline from hairstylist John Frieda that helps determine whether short or long hair suits your face. Measure from your earlobe to your chin. If the distance is less than 2.25 inches, short hair will flatter your features. If it is more than 2.25 inches, longer styles tend to work better. This rule is about face shape suitability, not about how much to trim.
Is cutting off 2 inches a trim?
Cutting off 2 inches is generally considered a haircut rather than a trim. A typical trim removes 1/4 to 1 inch of hair. At 2 inches, you are removing visible, noticeable length that changes your overall style. However, if your hair is very long and damaged, a stylist may recommend 2 inches to remove split ends that have traveled up the shaft.
What is the 3:2:1 rule for haircuts?
The 3:2:1 rule is a proportion guideline used by some stylists for layered haircuts. It refers to the ratio of length in different sections: the back is 3 parts, the sides are 2 parts, and the front framing pieces are 1 part. This creates a balanced, layered look that frames the face. It is a cutting principle for stylists, not a measurement guide for clients.
What is the 3 inch rule for hair?
The 3 inch rule typically refers to the minimum hair length needed to donate to organizations like Locks of Love or Wigs for Kids. Most hair donation programs require a minimum of 8 to 12 inches, but some accept 6 inches for shorter wig styles. The rule is unrelated to trim amounts and applies only to donation scenarios.
What is the 5.7 rule for hair?
The 5.7 rule is not a widely recognized standard in professional cosmetology. It may refer to the average rate of hair growth, which is approximately 0.5 inches per month or about 6 inches per year. Some sources cite 5.7 inches as the average annual growth rate. This number helps you plan how long it will take to regrow length lost to a larger-than-expected trim.
How much length do you actually lose in a trim?
A standard trim removes between 1/4 inch and 1 inch of hair. A dusting removes 1/8 to 1/4 inch and is barely visible. A deep trim removes 1/2 to 1 inch and is noticeable but not dramatic. Anything over 1 inch is typically considered a haircut. The exact amount depends on your hair damage level, hair type, and how clearly you communicate your goals to your stylist.
How can I make sure my stylist doesn’t cut too much off?
Use the show, don’t tell method: physically pinch the exact amount you want removed between your fingers and show your stylist. Avoid vague phrases like just a trim. Instead say this is the exact amount I want off, no more. Ask your stylist to confirm the amount before cutting, and request that they check in with you after the first section is cut.
Conclusion: Take Control of Your Trim Length
Knowing how to tell how much length you actually lose in a trim puts you back in the chair with confidence. Use the ruler and reference point method for precise tracking, the finger or coin methods for quick visual checks, and the photo comparison method for long-term documentation. These five techniques, combined with the show-don’t-tell communication strategy, eliminate the guesswork that causes trim anxiety.
The next time you book a trim, arrive prepared. Know your current measurement, decide on your desired trim amount, and practice showing that amount with your fingers before you sit down. Communicate clearly, confirm with your stylist, and track your results. You work too hard growing your hair to lose more length than necessary, and with these tools, you never have to again.