
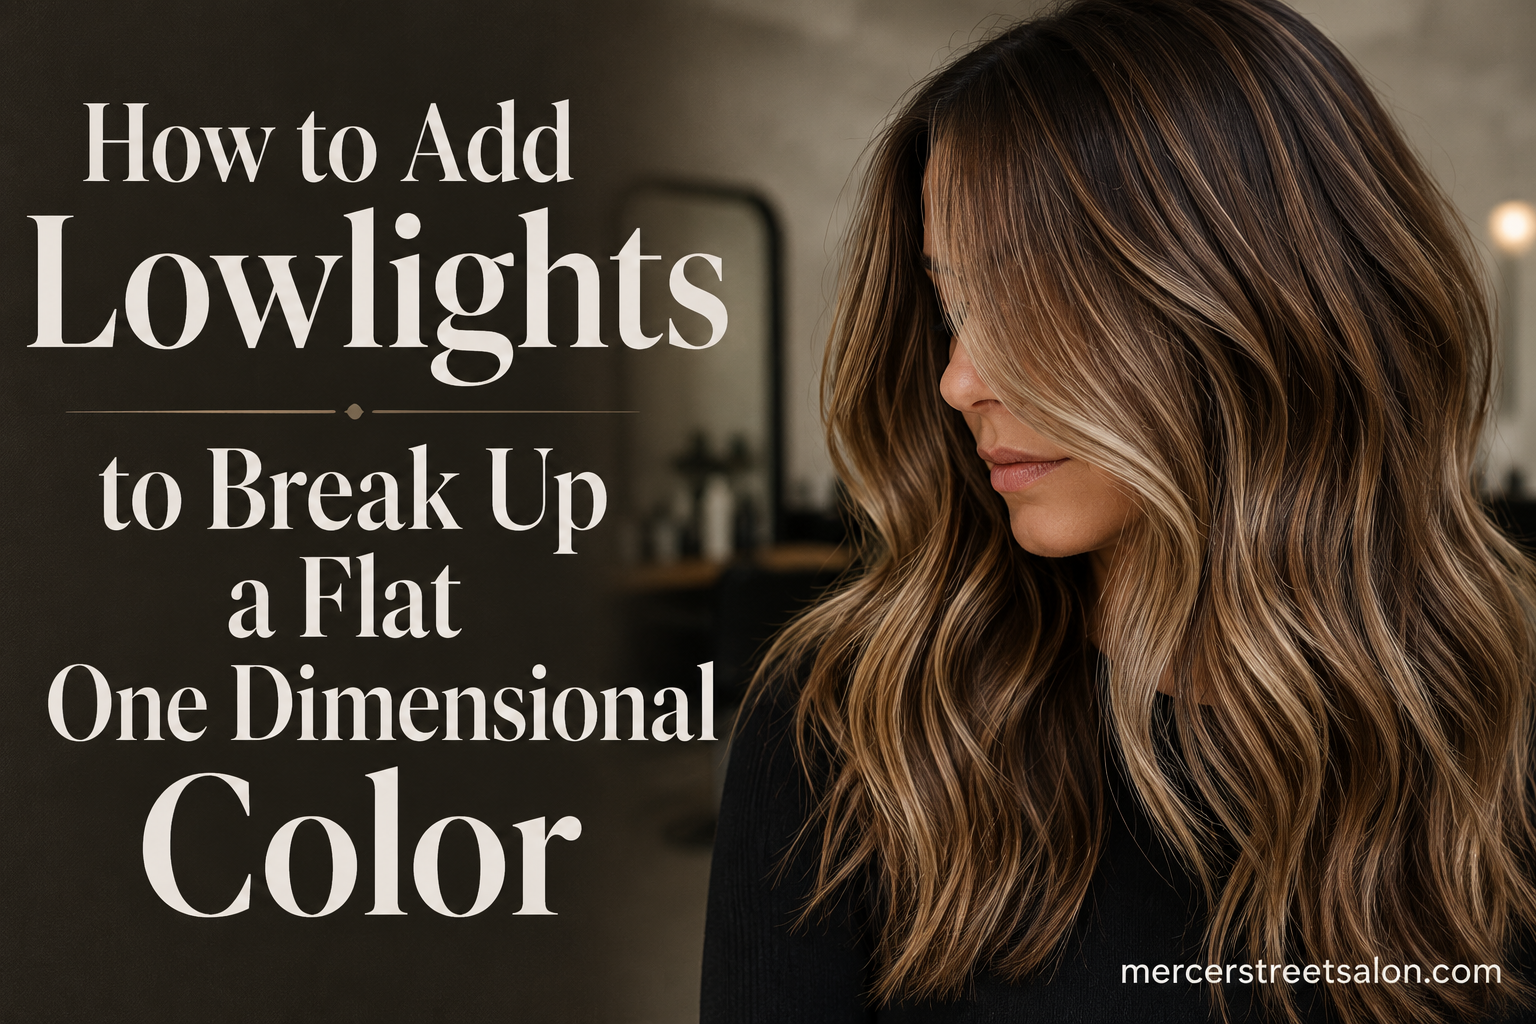
Flat, one-dimensional hair color is one of the most frustrating things that can happen to your hair. You know the look: every strand is the same shade, there is no movement, no depth, and no life. It looks like a helmet of solid color sitting on your head.
If you have been highlighting your hair for years and it now looks like what stylists call “the blonde block,” you are not alone. This is one of the most common complaints we hear at our salon. The good news is that learning how to add lowlights to break up a flat one dimensional color is the exact solution you need.
Lowlights are darker strands of color woven into your hair to create depth, shadow, and dimension. They do the opposite of highlights. Instead of lightening your hair, they add richness back. Yes, lowlights absolutely add dimension. They mimic how natural sunlight creates lighter and darker areas in hair, making it appear thicker, more textured, and more expensive.
In this guide, our team walks you through everything you need to know. We cover what lowlights are, how they differ from highlights, which shades work best, how the application process works step by step, and how to maintain your results. Whether you are booked in for a salon appointment next week or just starting to research your options, this guide will give you the confidence to get the dimensional color you want.
Table of Contents
What Are Lowlights and How Do They Work
Lowlights are sections of hair dyed darker than your base color to create the appearance of depth and dimension. A colorist selects shades that are typically 1 to 3 levels darker than your existing color, then weaves those darker shades through specific sections of your hair using foils or freehand painting techniques.
Think of lowlights as contouring for your hair. Just as makeup contouring uses darker shades to create shadows and define facial structure, hair lowlights use darker tones to create the illusion of depth, movement, and fullness. The darker strands recede visually while the lighter strands pop forward, creating a three-dimensional effect.
Here is why this matters: hair that has only ever been lightened becomes flat over time. When every strand is the same brightness, your eye has nothing to focus on. There is no contrast, no shadow, no play of light. The result is what stylists call “the blonde block” or flat one-dimensional color.
Lowlights fix this by reintroducing the natural variation that healthy, undyed hair has. Think about a child who has never colored their hair. Their hair is not one flat shade. It has lighter pieces on top where the sun hits, darker pieces underneath, and a natural gradient throughout. Lowlights recreate that effect.
The technical process involves depositing color into the hair rather than lifting it. This means lowlights are actually less damaging than highlights. Highlights require bleach or high-lift tint to strip natural pigment from the hair. Lowlights simply add pigment back in. For hair that has been over-processed from years of highlighting, this deposit-only approach gives the hair a break while making it look dramatically better.
Most colorists use demi-permanent color for lowlights. Demi-permanent formulas are gentler than permanent dyes because they do not require high-volume developer. They gradually fade over 6 to 8 weeks, which means your lowlights grow out softly without a harsh line of demarcation.
Lowlights vs Highlights: What Is the Difference
The simplest way to understand the difference is this: highlights lighten your hair, lowlights darken it. But there is more nuance than that, and understanding it will help you communicate better with your stylist.
Highlights involve lifting the hair several levels lighter using bleach or high-lift color. They brighten your overall look and create a sun-kissed effect. Lowlights do the opposite. They add darker tones back into your hair to create contrast against the lighter pieces.
Many people assume they need more highlights when their hair looks flat. This is usually the worst thing you can do. Adding more lightener to already over-processed hair makes it flatter, not brighter. It pushes you further into that solid block of color. Lowlights are the correction tool.
Quick Comparison: Lowlights vs Highlights vs Babylights vs Balayage
Here is a breakdown of how each technique compares so you know exactly what to ask for:
Lowlights: Darker strands woven into the hair. Adds depth and dimension. Best for breaking up flat color and over-processed blonde. Uses deposit-only color. Low damage.
Highlights: Lighter strands lifted from the base. Adds brightness and a sun-kissed look. Best for first-time lightening or refreshing existing brightness. Uses bleach or high-lift tint. Moderate to high damage depending on how many levels are lifted.
Babylights: Ultra-fine highlights that mimic natural sun lightening on a child. Very subtle, very fine weave. Best for a natural, barely-there brightening effect. Uses bleach. Lower damage than traditional highlights because of the fine application.
Balayage: Freehand painting technique that creates a graduated, lived-in effect. Can be used for both highlights and lowlights (reverse balayage). Best for low-maintenance, grown-out looks. Damage level depends on whether lightener or deposit color is used.
Can you combine lowlights and highlights? Absolutely. In fact, the most natural-looking dimensional hair color uses both. The highlights give you brightness and the lowlights give you depth. Together they create the multi-tonal effect that makes hair look naturally rich and full of movement.
Who Benefits Most from Lowlights
Lowlights are not just for one type of hair. They solve a wide range of color problems. Here are the situations where lowlights make the biggest difference.
Over-Processed Blondes
If you have been getting full highlights every 6 to 8 weeks for years, your hair is likely over-processed. Every strand has been lifted to a similar level, and the result is flat, uniform brightness with no depth. This is the most common scenario we see.
Lowlights are the single best fix for over-processed blonde. By weaving darker strands back through the hair, your colorist breaks up that solid wall of lightness. The contrast between the existing blonde and the new darker strands creates instant dimension. Your hair goes from looking like a flat yellow sheet to looking like it has natural variation and depth.
One of our clients came in after five years of continuous full highlights. Her hair was a uniform level 10 blonde from root to tip. After one session of lowlights woven through the back and sides, she said her hair looked like it did when she was a teenager. The dimension made it look thicker, healthier, and more expensive.
Brunettes Wanting Richer Color
Brunettes are often overlooked when it comes to lowlights, but they can benefit enormously. If your brown hair looks flat and monotone, adding darker lowlights in chocolate, espresso, or deep chestnut tones creates richness and depth that a single-process color cannot achieve.
This is especially effective for brunettes who have had balayage or ombré and want to add some darkness back into the mid-lengths and ends. Lowlights can bring back the dimensional gradient that makes brown hair look glossy and expensive.
Fine and Flat Hair
If you have fine or thin hair, you might worry that darker color will make it look even thinner. The opposite is true when lowlights are applied correctly. Dimensional color creates an optical illusion of thickness.
When your hair is all one color, the eye sees a flat surface. When there are darker and lighter strands mixed together, the eye perceives texture and volume. This is the same principle as why textured fabric looks thicker than flat fabric. Lowlights give fine hair the appearance of body and fullness that no styling product can replicate.
Reddit users in the r/finehair community frequently discuss this. One user shared that after adding lowlights to her fine blonde hair, people started asking if she had gotten extensions. The dimension alone made her hair look twice as thick.
Growing Out Chunky Highlights
Chunky highlights from the early 2000s and 2010s are one of the hardest things to grow out. The thick, bold streaks look dated as they grow down the hair shaft, and simply letting them grow creates an awkward two-tone effect.
Lowlights are the bridge between chunky highlights and natural-looking color. Your stylist can weave darker strands between and over the chunky highlights, softening the contrast and blending everything together. A professional stylist on Reddit’s r/hairstylist community put it perfectly: “The best thing you could do is get a root shadow and a partial lowlight to break up the chunks.”
This approach typically takes 1 to 3 sessions to fully transition, depending on how many chunky highlights you have and how light they are. But even after the first session, the difference is dramatic.
Gray and Silver Hair
Lowlights are an excellent option for women with gray, silver, or transitioning hair who want dimension without full coverage color. Instead of dyeing all your gray hair, lowlights add strategic darker strands that blend with your natural silver, creating a sophisticated multi-tonal look.
This approach is often called gray camouflage. It softens the line between any existing color and your growing gray roots, making the transition look intentional and elegant. For women over 50 who want to embrace their gray but still want dimension, lowlights are the perfect middle ground.
Choosing the Right Lowlight Shade
Selecting the right shade is the most important part of getting lowlights that look natural and beautiful. Go too dark and your hair will look muddy. Go too cool and it can look ashy and flat. Here is how to choose the right tone.
The 1 to 3 Levels Darker Rule
The golden rule of lowlight shade selection is to go 1 to 3 levels darker than your base color. The hair color scale runs from 1 (black) to 10 (lightest blonde). If your current base is a level 8 (medium blonde), your lowlights should be between level 5 (light brown) and level 7 (dark blonde).
Going just 1 level darker creates subtle, barely-there dimension. This is perfect for first-timers who are nervous about lowlights looking too dramatic. Going 2 to 3 levels darker creates more visible contrast and is ideal for breaking up very flat, heavily lightened hair.
Going more than 3 levels darker is generally a mistake. The contrast becomes too harsh and the lowlights look unnatural, like stripes rather than dimension. If you need more drama, your colorist can use a wider weave or more lowlight sections rather than going darker.
Warm vs Cool vs Neutral Tones
Beyond depth, you need to choose the tone of your lowlights. This decision should be based on your skin undertone and the effect you want to achieve.
Warm lowlights include golden brown, caramel, chocolate, and chestnut tones. These shades have red, orange, or gold undertones. Warm lowlights are ideal for people with warm or olive skin undertones. They add richness and a sun-warmed feel to the hair. Caramel and chocolate lowlights are especially popular for brunettes and dark blondes because they create a luxurious, glossy effect.
Cool lowlights include ash brown, mushroom brown, taupe, and smoky tones. These shades have blue, green, or violet undertones that neutralize warmth. Cool lowlights are ideal for people with cool or pink skin undertones. They create a sophisticated, muted dimension that works beautifully on ash blonde and silver hair.
Neutral lowlights sit between warm and cool. They have no dominant undertone and blend with almost any base color. If you are unsure whether to go warm or cool, neutral is the safest choice. Your colorist can also custom-mix a shade that is slightly warm or slightly cool to match your specific base.
Matching Your Undertones
For a seamless blend, your lowlight shade should complement your existing color’s undertone. If your highlights are warm gold, choose warm caramel lowlights. If your base is cool ash blonde, choose cool ash brown lowlights. Mixing warm lowlights into cool blonde hair creates a jarring, unnatural contrast.
If your hair has brassiness (unwanted warm orange or yellow tones), cool or neutral lowlights can actually help tone it down. The darker, cooler strands counterbalance the brassy lighter pieces, making the overall color look more balanced and intentional.
What Shades to Request When Your Hair Looks Flat
If your hair is flat and one-dimensional and you want to fix it, here are specific shades to ask for based on your current color:
For flat blonde hair: Request caramel or golden brown lowlights 2 levels darker than your blonde. Ask for a fine weave so the lowlights blend softly. Avoid ash tones unless your blonde is already cool-toned.
For flat brunette hair: Request espresso or dark chocolate lowlights 1 to 2 levels darker than your base. Ask for them in the underlayers and around the face for a contoured effect.
For flat highlighted hair: Request lowlights that match your natural root color or are 1 shade lighter. This creates a lived-in, dimensional effect that grows out gracefully.
For flat red or auburn hair: Request deeper mahogany or chestnut lowlights 1 to 2 levels darker. This enhances the natural richness of red hair and prevents it from looking like a flat copper wash.
How to Add Lowlights to Break Up a Flat One Dimensional Color
This is the core of what you came here for: the actual process of adding lowlights to break up flat color. Whether you are a colorist refining your technique or a client wanting to understand what happens in the chair, here is exactly how lowlights are applied.
Step 1: Consultation and Shade Mapping
Before any color touches your hair, the colorist evaluates your current base color, the level of existing highlights, your hair porosity, and your skin undertone. This determines the lowlight shade, the placement pattern, and the technique.
For clients with flat one-dimensional color, the colorist will identify which areas need the most depth. Typically, the underlayers of the hair and the sections around the face benefit most from lowlights. This placement creates a shadow effect that mimics natural hair.
Step 2: Sectioning the Hair
The colorist sections your hair into clean, systematic panels. For a full head of lowlights, they typically work in 4 to 6 large sections: two in the back, one on each side, and one on top. Each large section is then divided into smaller subsections about a quarter inch thick.
Clean sectioning is critical. If the sections are messy, the lowlights will look random and patchy. The colorist uses sectioning clips to keep the panels tight and organized.
Step 3: Weave or Slice Technique
This is where the magic happens. The colorist has two main options for picking up strands of hair to apply lowlight color.
The weave technique: Using a tail comb or a rattail comb, the colorist picks up very fine slices of hair and weaves the comb back and forth, similar to how you would weave a basket. This separates the hair into thin alternating strips. Some strips are placed on the foil for lowlight color, while the remaining strips are left out. The result is fine, natural-looking lowlights that blend softly with your existing color.
The slice technique: Instead of weaving, the colorist takes a clean slice of hair, about an eighth to a quarter inch thick, and applies color to the entire section. This creates wider ribbons of darker color. Sliced lowlights are more visible and dramatic. They are great for creating bold contrast or for breaking up very thick, chunky highlights.
For breaking up flat one-dimensional color, most colorists use a combination of weave and slice. Fine weaves around the face and hairline for a natural blend. Wider slices in the back and underlayers for depth and dimension.
Step 4: Applying the Color
Once the strands are picked up, the colorist applies the lowlight formula to the hair. For foil lowlights, the color is painted onto the hair section, the foil is folded, and the process repeats moving through each section.
For balayage lowlights (also called reverse balayage), the colorist freehand-paints the darker shade onto the hair without foils. This creates a softer, more diffused effect. Reverse balayage is excellent for clients who want lowlights that look completely natural and grown-out from the very first day.
The color formula is typically a demi-permanent deposit-only color. This is important for hair health. Because lowlights do not require lifting, there is no bleach involved. The color simply deposits pigment into the hair shaft, which is far less damaging than highlighting.
Step 5: Processing Time
Once all the lowlights are applied, the color processes for 20 to 35 minutes. The exact time depends on the formula, your hair porosity, and how dark the lowlight shade is. Highly porous hair absorbs color faster, so the processing time may be shorter.
During processing, the colorist may also apply a root smudge or root shadow. This is a technique where a thin layer of your natural root color is smudged down into the first inch or two of the hair shaft. Combined with lowlights, this creates a seamless, lived-in effect that grows out beautifully.
Step 6: Rinse, Tone, and Style
After processing, the foils are removed and the hair is rinsed with cool water. A toner or gloss may be applied to blend the lowlights with your existing color and add shine. Toners are especially important if your highlights have any brassiness that needs neutralizing.
Finally, your hair is blow-dried and styled. This is the moment of truth. When the hair is dry and styled, the full effect of the lowlights becomes visible. Flat, one-dimensional color is replaced with rich, dimensional, multi-tonal hair that looks naturally beautiful.
What to Expect at Your Salon Appointment
If you have never had lowlights before, knowing what to expect at your appointment takes the anxiety out of the process. Here is a walkthrough of a typical lowlight appointment from start to finish.
The Consultation (10 to 15 Minutes)
Your appointment starts with a consultation. Your colorist will look at your hair in natural light if possible, assess the current color level, check for damage, and discuss your goals. This is the time to be specific about what you want.
Show your colorist photos of dimensional hair color you like. Be clear that you want to add depth, not more brightness. Many clients make the mistake of saying “I want dimension” without specifying whether they mean highlights or lowlights. Say the word “lowlights” so there is no confusion.
The Application (60 to 90 Minutes)
Once you agree on a plan, the application begins. Your colorist will section your hair and start weaving or slicing the lowlight color into foils or painting it freehand. Expect to be in the chair for about 60 to 90 minutes for the application portion.
This is a good time to relax. Most salons offer water, tea, or coffee. Some clients read or scroll their phones. The application is painless and requires nothing from you except sitting still.
Processing (20 to 35 Minutes)
After all the lowlights are applied, you will sit under a warm lamp or simply let the color process at room temperature for 20 to 35 minutes. Your colorist will check the color periodically to make sure it is developing correctly.
Rinse, Tone, and Style (30 to 45 Minutes)
Once the color is fully processed, the foils come out and your hair is rinsed. If a toner or gloss is needed, it is applied now and processes for another 10 to 15 minutes. Then your hair is washed with a color-safe shampoo and conditioned.
The final step is the blow-dry and style. Your colorist will blow-dry your hair to reveal the full dimensional effect. This is often the most exciting part of the appointment, seeing how the lowlights have transformed flat color into rich, multi-tonal hair.
Total appointment time: typically 2 to 3 hours depending on hair length, thickness, and the number of lowlights being applied.
How to Ask Your Stylist for Lowlights
One of the biggest pain points we hear about is the communication gap between clients and stylists. Clients say “I want dimension” and the stylist gives them more highlights. Here is how to make sure you get lowlights, not more brightness.
Use the Word “Lowlights”
The single most important thing you can do is use the word “lowlights” directly. Do not say “dimension” or “depth” and assume your stylist knows what you mean. Say: “I want to add lowlights to break up my flat color.”
Show Photos
Bring 2 to 3 reference photos. Look for photos of hair that has both light and dark strands visible. Point to the darker pieces and say, “I want these darker strands woven through my hair.” This makes it crystal clear.
Be Specific About the Problem
Tell your stylist exactly what is bothering you. Say: “My color looks flat and one-dimensional. It has been highlighted too many times and it looks like a solid block. I want to add some darker depth back in.”
This gives your stylist the full picture. They know you are not asking for more lightening. You are asking for color correction through depth.
Ask About the Shade
Ask your stylist: “What shade do you recommend for my lowlights?” A good colorist will consider your skin tone, existing color, and hair condition before recommending a shade. If they suggest something 1 to 3 levels darker than your base, you are in good hands.
Discuss Maintenance
Ask: “How often will I need to come back for lowlights?” and “Will these fade?” This sets expectations and helps you plan your maintenance schedule. Lowlights are generally lower maintenance than highlights because they grow out softly.
Salon Terminology Translation
Here is a quick translation guide from salon jargon to plain English:
“Dimensional color” means a mix of light and dark strands. If your stylist says this, ask whether they mean highlights or lowlights.
“Deposit-only” means adding color without lifting. This is what lowlights are. No bleach involved.
“Demi-permanent” is the type of color typically used for lowlights. It fades gradually over 6 to 8 weeks.
“Root shadow” or “root smudge” is a technique that blends your natural root color into the lengths. It is often combined with lowlights for a seamless, lived-in look.
“Reverse balayage” is freehand-painted lowlights. The word “reverse” means darker instead of lighter.
Maintaining Lowlights: How Long They Last
One of the best things about lowlights is that they are relatively low maintenance. Because they use demi-permanent deposit color, they fade gradually rather than growing out in a harsh line. Here is how to keep them looking fresh.
How Long Do Lowlights Last?
Lowlights typically last 6 to 8 weeks before they start to noticeably fade. After about 12 weeks, most of the color will have washed out and you will be ready for a refresh. This is a longer interval than highlights, which usually need touching up every 6 weeks.
How long your lowlights last depends on several factors. Hair porosity is the biggest one. Highly porous hair absorbs color quickly but also releases it faster. If your hair is very porous from previous damage, your lowlights may fade more quickly. Using color-safe hair care products can significantly extend the life of your lowlights.
Shampoo and Conditioner Tips
The number one rule for maintaining lowlights is to switch to a sulfate-free shampoo. Sulfates are harsh detergents that strip color from the hair. Every wash with a sulfate shampoo is pulling the lowlight color out of your hair.
Look for shampoos labeled “color-safe” or “sulfate-free.” Wash your hair no more than 2 to 3 times per week. On non-wash days, use a dry shampoo to absorb oil without stripping color.
Always follow with a color-protecting conditioner. Focus the conditioner on the mid-lengths and ends of your hair, where the lowlights are most concentrated and where the hair is oldest and most porous.
Toners and Glosses
Between lowlight appointments, a toner or gloss treatment can refresh your color and add shine. Toners neutralize any brassiness that develops over time. Glosses add a clear or tinted shine coat that makes hair look freshly colored.
Most salons offer express gloss treatments that take 30 minutes and cost significantly less than a full color service. Booking a gloss every 4 to 6 weeks between lowlight appointments is a great way to keep your color looking fresh without over-processing your hair.
Avoiding Brassiness and Fading
Brassiness is the warm, orange, or yellow tones that develop as hair color fades. It is the enemy of dimensional color. Here is how to prevent it:
Use a purple shampoo once a week if you have blonde highlights mixed with your lowlights. Purple shampoo neutralizes yellow tones in the lighter pieces. Do not use it more than once a week or it can leave a purple tint.
Protect your hair from UV rays. Sun exposure fades color fast. Wear a hat in strong sun, and consider a UV-protecting hair product if you spend a lot of time outdoors.
Avoid hot water when washing your hair. Hot water opens the hair cuticle and lets color escape. Wash with warm or cool water to seal the cuticle and lock in color.
Minimize heat styling. Flat irons and curling wands set to high temperatures can cause color to fade faster. Always use a heat protectant spray before styling.
Common Mistakes to Avoid with Lowlights
Even the best technique can go wrong if certain mistakes are made. Here are the most common lowlight errors and how to avoid them.
Going too dark. Lowlights that are more than 3 levels darker than your base look unnatural. They create a striped effect rather than dimension. Stick to 1 to 3 levels darker and trust the process.
Choosing the wrong tone. Warm lowlights in cool blonde hair (or vice versa) create a jarring contrast. Always match the undertone of your lowlights to your existing color’s undertone.
Skipping toner. Toner is what blends the lowlights with your existing color. Without it, the lowlights can look disconnected and obvious. Always budget time for a toner or gloss at the end of your appointment.
Overlapping with the natural base. If lowlights are placed too close to your natural root color, they can look like a mistake rather than an intentional technique. Your colorist should place lowlights strategically, not randomly across every section.
Too many lowlights at once. If your hair has been flat blonde for years, adding a huge amount of lowlights in one session can be a shock. Start with a partial lowlight service focusing on the underlayers and around the face. You can always add more at your next appointment.
FAQs
Do lowlights add dimension?
Yes, lowlights are one of the most effective ways to add dimension to flat hair. By weaving darker strands through your base color, they create contrast and depth that makes hair look multi-tonal, thicker, and more natural. This is exactly why colorists recommend lowlights for hair that has become flat from repeated highlighting.
How to add lowlights to over highlighted hair?
To add lowlights to over-highlighted hair, your colorist selects a shade 1 to 3 levels darker than your current blonde and weaves it through specific sections using foils or freehand balayage. They typically focus on the underlayers and around the face. A root smudge and toner are then applied to blend everything together for a seamless, dimensional result.
What color do you use for lowlights?
Lowlights use a demi-permanent deposit-only color that is 1 to 3 levels darker than your base. For blondes, this is typically a caramel, golden brown, or light brown shade. For brunettes, chocolate or espresso tones work well. The tone should match your existing color’s undertone, whether warm, cool, or neutral.
How long do lowlights last?
Lowlights typically last 6 to 8 weeks before noticeably fading. Because they use demi-permanent color, they fade gradually rather than growing out in a harsh line. Most clients get lowlights refreshed every 8 to 12 weeks. Using sulfate-free shampoo and booking regular gloss treatments extends the life of your lowlights.
Do lowlights damage hair?
Lowlights are significantly less damaging than highlights. They use deposit-only color, which means no bleach or high-lift developer is needed. The color simply adds pigment back into the hair shaft. For hair that is already damaged from years of highlighting, lowlights give the hair a break while making it look better.
Can I do lowlights and highlights at the same time?
Yes, combining lowlights and highlights creates the most natural-looking dimensional color. The highlights provide brightness while the lowlights add depth. Many colorists use both techniques in a single appointment to create a balanced, multi-tonal result. This approach is ideal for clients who want maximum dimension.
Will lowlights make my hair look darker?
Lowlights do add darker strands, but when applied correctly, they should not make your overall hair look darker. The darker pieces are woven among your lighter strands, creating contrast and depth rather than an all-over darkening effect. If you are concerned, ask for fewer lowlights or a shade only 1 level darker for a subtle result.
Can I give myself lowlights at home?
DIY lowlights are not recommended. Box dye cannot match the custom formulation and precise placement that a professional colorist provides. Applying lowlights requires understanding of hair levels, undertones, and sectioning techniques that are difficult to replicate at home. The risk of patchy, muddy, or overly dark results is high. Always see a professional colorist for lowlights.
Are lowlights good for gray hair?
Yes, lowlights are excellent for gray and silver hair. They add strategic darker strands that create dimension and blend with your natural silver. This approach, often called gray camouflage, softens the transition between existing color and growing gray roots without the need for full coverage dye. Lowlights make gray hair look intentional and sophisticated.
What is the difference between lowlights and babylights?
Lowlights add darker strands to your hair to create depth, while babylights are ultra-fine highlights that add lighter strands for a sun-kissed effect. They are opposites in terms of color direction. Lowlights deposit darker color, babylights lift the hair lighter. Both can add dimension, but lowlights are the solution for hair that is too flat or over-lightened.
Conclusion
Learning how to add lowlights to break up a flat one dimensional color is truly transformative for your hair. Flat color happens when hair is repeatedly lightened without any depth being added back. Lowlights solve this by weaving darker strands through your base, creating the contrast and dimension that makes hair look naturally rich, thick, and full of movement.
Remember the key takeaways: choose a shade 1 to 3 levels darker than your base, match the undertone to your existing color, ask for a combination of weave and slice techniques, and always finish with a toner. Use sulfate-free shampoo and book gloss treatments to maintain your results for 8 to 12 weeks.
If your hair has been looking flat, lifeless, or like a solid block of color, book a consultation with a professional colorist and ask specifically for lowlights. Bring reference photos, use the word “lowlights,” and be clear about wanting depth rather than more brightness. The transformation from flat to dimensional can happen in a single appointment, and you will wonder why you waited so long.